FREE Scavenger Hunts

How do you learn the best?  

For me, it is certainly not by sitting and listening all day long.  That's why I like to put some movement into our classroom.  Movement is great for both homeschool and public school!


Fun Scavenger hunts for kids of all ages

Whether your children are five or fifteen, there's fun to be had in a scavenger hunt, and I have several for you.  The best part is that they are FREE!

Notice the higher vocabulary on some of these.  Your child is like a sponge.  Take advantage!  Don't minimize vocabulary, even at the youngest age.  A rich vocabulary helps expand your child's brain.  Explain the meanings of the words, and use them in everyday conversations.

(Side note - People are absolutely amazed at my little grandson's vocabulary.  It's because we never simplified language just because he was little.  So many people think, "little person, little words".  NO!!!  Use those big words.  They can handle them!)
Meme with babies


Use one of these scavenger hunts when you and/or your child is feeling restless, or use it when you need a fun break.  Other benefits are exercise and cognitive thinking.  What one person finds as an answer may very well be a different answer from another person.  It's good to discover that more than one answer will work.
Freebie scavenger hunts

Click on picture to download your free copy.


That's just...

My Kind of Teaching


Once-a-Month Menu Planning

You're organized.  You've shopped for ONLY items on sale.  You're stocked up.  We're now ready for the BEST part...MENU PLANNING.


Simple and easy menu planning for tired teachers

The Big Idea

The main thing to remember is that you will plan all of your meals for the next month around what you have on hand already stocked up.  

(If you're feeling a little iffy about planning for an entire month, try starting off by planning for just one week.)

The Master List

Include your family in this important step.  It will help them feel like they're a part of this new way of thinking in your household.  Make a MASTER LIST of every meal you serve.  On your list, make a heading of the main ingredient (ex: chicken, pork, beef, pasta, etc.).  Under the heading, list every dish you cook using that main ingredient.  Ask your family to list their favorite dishes, and make sure to include those.  Don't forget to do the same for side dishes, breads, and desserts.

Include your family in menu planning


Meats are usually the largest expense of a meal.  To save the most money each week, try to plan at least one or two meatless meals.  Consider making a heading of meatless meals, such as cheese sandwiches, vegetable soup, baked potatoes and salad, veggie or cheese pizza, tomato soup, pastas, vegetable lasagna, breakfast for dinner (waffles, eggs, hash browns, etc.).  The list is endless!

Keep this master list handy to use each month when you plan a new menu.  Add new recipes to it as you discovery more you like.

Making a Plan

As you begin, think about your normal work week.
  • Is there a certain night for church or other activities?
  • Do your children have practice or ball games that will make for a late evening?
  • Are you more tired usually on Thursday than on Monday?  (As a teacher, this was always the case for me!)
  • Does your family have a large meal on Sunday?
  • What day is a good day for someone else to prepare a meal?
Print out a calendar to use for planning out your meals.  (I also suggest using a pencil to write.)  Look at your master list.  Which ones do you have all of the ingredients already in your pantry/fridge/freezer?  Write those meals on your calendar.  As you plan, let your children choose their favorite meals for sometime during the month.  Try to include some of these suggestions to simplify your life.
  • Plan one or two "easy" nights each week.
  • Plan a night (or two) for someone else to cook.  (Even younger children can fix cold sandwiches for the family.)
  • Plan a night to eat up all of the leftovers.  (My daughters used to make a menu each week as for a leftover "restaurant".

Breakfast/Lunch/Snacks

On a separate page, make lists for breakfast, lunch, and snacks.  List these as "choices".  These are meals on your own (without planning - unless you choose to do so).  By making a list to display, it helps the family see what they CAN choose from and ensures that they are not eating items that are needed for your dinner menus.

Putting Your Menu into Action

Post the completed menu on your fridge or somewhere else easily seen.  Each evening, check to see the next evening's meal plans to allow you to thaw, meal prep, etc. in a timely manner.

The Benefits

  • The first words out of your darling family's mouths are no longer, "What's for dinner?"  (If it is, point to the calendar, or give them "THE LOOK",  haha!)

  • After an exhausting day at work, you don't have to come home and try to figure out a game plan for a fast meal.

  • Without a menu, extra trips to the grocery store are sometimes needed, causing extra expense.

  • With a plan, it's easier to grab fast food, which again eats into that budget!

  • With a plan in place, the afternoons are not as hectic, giving you a little rest time!

Pull out those menus and get started.  You're just in time for a new month and to get any kinks worked out before it's time for back to school.

Check back next Friday when I'll share some of my favorite frugal meal plans!  :-)

That's just...

 MY Kind of Teaching!

No-Prep Math Centers for August

Teacher confession time...

Every year, without fail, the end of school rolled around, and for the entire last month, I COULD NOT WAIT for the last teacher workday and summer to begin, and...whoa, whoa, WHAT???


When your teacher brain won't shut off even though it's summer

Just like that, I would start reflecting on things to prepare for the next school year, changes to implement, and new ideas to try.  I would always get so charged up that it took me two or three weeks to get out of school mode and into summer mode!  Does this happen to you??  (PLEASE say yes...lol!)

The first thing I always tried to do during the last month of school was to prepare my "No-Prep Math Centers" and "No-Prep Literacy Centers" for the first month back in school.  It was the perfect time of year because I always had a lot of students who couldn't wait to help by cutting and bagging.  (Hence, the NO prep.)  Don't worry that it's now summertime. They really ARE so easy to make that you'll have them made in a snap!


No prep math centers


Today I'm going to focus on my No Prep Math Centers for 4th grade.  However, you can find these for 2nd grade, as well as 3rd grade in my store, along with No Prep Literacy Centers for 2nd, 3rd, and 4th grades.  (Just click on the grade level to see the units.)

Each month usually has ten centers and two or three bonus activities.  If you are like I always was, there is WAY too little prep time in your day, and EVERY. SINGLE. SECOND is precious!  These centers are a breeze to get ready!  I have included games, interactives, foldables, movement, and more!  There is no colored ink used (other than answer guides), to make this even MORE user-friendly!

You have several choices for printing:
1)  Copy onto regular white copy paper.  Use for the week, throw in the trash, and print a new set next year!  (Easy-peasy, right??)
2)  Do you want to have those pops of color?  Print just the game pieces on colored paper (or construction paper).  Again, you can throw away or keep.  (Mine have held up for 2-3 years without lamination.)
3)  Print on colored cardstock and laminate.

How you choose to prepare really depends on the amount of time you want to spend prepping. 


This month's centers include:  

Fractional Sets 


Print and go fractional sets

Fourth grade is HUGE for fractions, so I like to get the year started with a review of fractional sets.  I like to always print the directions for all of my centers on colored copy paper to draw the students' eyes.  I also like to use two different colors for the fraction and the fractional set.  I only use a couple of pieces of my hoarded precious color copy paper.  I make copies of the student response sheet and my answer page on regular white copy paper. 


Rounding

Rounding


I love to keep this center out (along with several of the other ones) to use for small-group remediation.  Some students need that extra support and guidance on a concept, and being able to play this as a game is perfect.  In the center, the students work together to decide if the numbers round up or down.  In years past, I have used this as a center during our unit on rounding and then used the worksheet for a formative grade.  At a glance, I was able to see which students needed to work in a guided small group.


Place Value

Place value

This activity is one of my favorites to do during the first couple of days of school during our math time as we are getting settled in.  While I'm checking to make sure that I'm positive how every student is getting home, checking in supplies, or any of the other million and one things I need to accomplish, the students do this activity as a whole class during quiet time.  (Admit it; you know that by the middle of that first day back, you need just a LITTLE time to rest your ears, haha!)  I put the directions on the document camera and project them onto the large screen at the front of my room.  I carefully explain the directions and even do a couple with the students to make sure that they understand.  While they work, I'm able to do some of those much needed beginning of school chores!

Comparing Numbers

Comparing numbers

This is one of my students' favorite centers every year and it is oh, so simple!!!  Students play in a small group.  The number cards are stacked upside down on the table.  Students take turns going around in a circle and drawing the top card.  They begin in the ones place to build the number.  (This game can be played for any place value to differentiate your students' needs.)  Once every student has built his or her number, someone spins the spinner using a pencil and a paper clip.  If the spinner lands on "greater than", the student with the largest number wins.  If the spinner lands on "less than", the student with the smallest number wins.

Classroom Treasure Hunt

Add movement to your classroom with classroom treasure hunts

I love giving my students every opportunity throughout our day to have some movement, considering that recess is only 15 minutes each day (so, so sad).  My students LOVE these scavenger hunts.  I print the cards on bright paper, scatter them all around the room, and students move around to read the cards and write the answers.  I've used this center both as a small group and as a whole class (which is my favorite).  I like to collect their response pages to use as an informal data collection for different skills so that I can start forming small remediation groups.  However, I always place the cards under the document camera so that we can review and discuss as a class.

Addition with and without Regrouping

Addition with and without grouping

I have yet to give students "naked" addition or subtraction problems without hearing groans from someone.  However, when they have a cool name like "ninja" attached, all of a sudden, students can't wait to complete the problems.  (I'll call ANYTHING a cool name if it encourages students to do their best work!)

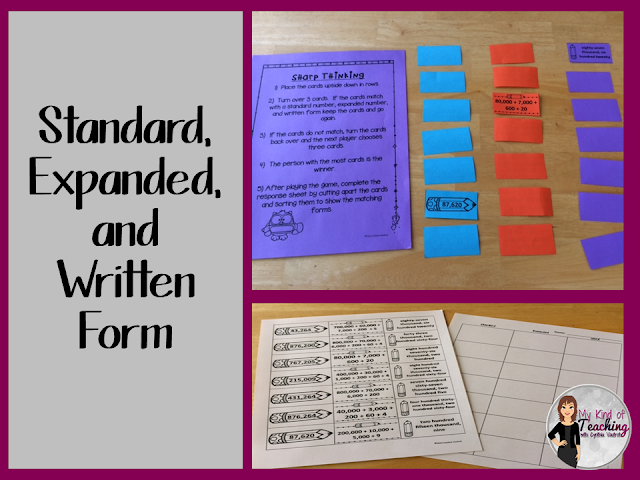
Standard, Expanded, and Written Forms
Standard, expanded, and written form

Our curriculum map always begins the year with all things related to place value.  I've tried to include a lot of activities in the August unit to help reinforce those concepts.  As always, I copy the instructions on colored copy paper.  I make three copies of each of the other pages so that the standard form is one color, the expanded is another, and the written is yet another color.  I then have students play this game with partners (or in small groups of 2-3 students).  Students turn the cards facedown.  They take turns turning one card from each row to try to make a match in the classic "Memory" game.  On another week, I have the students complete the second part, which is the response sheet of cutting and making the correct matches.  Numbers look very similar to make sure that students really understand the different forms.

Word Problems

Word problems

Sometimes, students just have to be convinced that they enjoy math.  "I LOVE Math" is an accordion book that students make.  They then choose word problem cards, read them, and solve in their books. 

Bar Graph

bar graph

I've combined the fun game of "I Spy" with a bar graph.  Students search for the pictures, count how many there are of each, put the information into a bar graph, and answer questions.

Ordering Numbers
Ordering large numbers


I always make two sets of these numbers.  (Make sure that you use two different colors for your own sanity of keeping them separated...haha.)  Students will work together to put the numbers in order.  Students then work independently to complete a response sheet by putting numbers in order.

Get a freebie when you join in on the freebie blog hop by clicking here.

Storage 

You can store the pieces of each center in a Ziploc bag, a large envelope, a small basket at the center, or whatever makes life easiest for you.  

Direction posters are included for each center.  Placing these in the center gives explanations to the students so that you are not spending valuable time explaining multiple times.


Printing

I don't worry about printing because I have HP Instant Ink.  This means that I get 300 pages every month.  It is based on the number of pages, not the ink.  My printer lets HP know when ink is running low, and I receive new ink in the mail before I even need it.  SCORE!!
Get free ink using my referral link

Click on the picture to get your own great deal on a wireless printer so that you can print all you need without worry!  
Please keep this link to enter to get extra months of FREE ink!
http://try.hpinstantink.com/hP7Wm

(Please note this blog post has an affiliate link for the printer.  This means that if you purchase using the link, I receive a very small commission that helps me with the upkeep of my website.  However, this doesn't add to the price of the item for you.)

Click on any of the above pictures to see this product in my store.

Easy- peasy, making your life breezy - that's just...


My Kind of Teaching!


Once-a-Month Grocery Shopping - Part 2

How did you do with getting your pantry, refrigerator, and freezer organized?  It was a real eye-opener for me the first time I did it! 

Now that you’ve made a list of what you have on hand, it’s time for step two!

When you go shopping for clothes, shoes, items for the home, etc., you probably don’t go into a store planning on paying full price, do you?  No, we all love those great sales and try to find the best deals.  Grocery shopping should use the same mentality, and that is what we’re going to focus on this week.

Frugal Friday: Once a month grocery shopping

Step Two
Whether you use (or don’t use) the weekly flyers for the best sales, it’s time to look at them just a little differently.  Pull out those weekly ads in paper form or online, and think critically as you look at the ads.  The point is to get stocked up on the things you normally use in your meal preparation.  Look through everything that is on sale.  What has the best prices?  What is your grocery budget?  You might only be able to get one item at the sale price, or your grocery budget might be enough that you can get several.  Remember, items will last just as long on your pantry shelf, refrigerator, or freezer as they will on the store shelf, waiting on you to pay full price when you are completely out of the item!

The secret to saving the most money is to get to the point where you are ONLY buying those items that are on sale.  The “Big Idea” is to get stocked up by purchasing only the items that are on sale, even if it is not something you need for this week’s menus.  When money allows, buy several of those items.  (Many sales items are repeated in a 12-week cycle.)  Always check the expiration date, and don’t purchase more than you can use in that length of time.

Now that you’ve perused the weekly ad, make a list of the items you want to purchase.  Be sure to include the name, size, and price of the item on sale.  If money is tight and there is something you want but it is not a pressing need, don’t purchase it.  Wait until the next time you see it on sale.  If money is REALLY tight, you might only be able to stock up on a limited number of items.  However, anything you can stock up on will save you money in the long run.

Add up the total of everything on your list so that you have an estimate of the cost.

If there are multiple stores that have items you want to purchase, combine them into one shopping day if possible, but don’t forget to take along a cooler for your cold items. 

By staying stocked up on items, you will find that it is rare to need to purchase things at full price.

Read the next blog post in this series, which includes your next steps to save money as you begin making a monthly menu using ONLY those items you already have on hand.

Helping you save money and stretch those dollars is just


10 Things to Buy at Dollar Tree in June

10 things to buy at dollar tree


Whether you are homeschooling your child or just looking for some fun (and cheap) activities for the summer break, you can't beat shopping at Dollar Tree!  Whenever I shop anywhere, I'm always looking and thinking of fun activities I can use the item for, which is not necessarily how it is normally used.  Keep reading for ways to cover literacy, math, science, social studies, and much more!

#1 - Mini Dust Pan and Brush
This makes a fun game to play at home or on a road trip!  Write uppercase or lowercase letters, numbers, cvc words, sight words, etc. on small pieces of paper.  Let your child throw the cards up in the air to scatter all over the floor.  Call out something for your child to sweep into the pan.  This is a fun and simple game that will have your child learning and practicing important concepts while "sweeping up"!

mini dust pan and brush

#2 - United States Wall Map
All children need to learn about geography, map skills, and the states.  Place this on a wall.  Use a pushpin or highlighter to mark the places you travel this summer.  Keep it up all year to continue using as your child learns about important landmarks, capitals, etc.

United states wall map

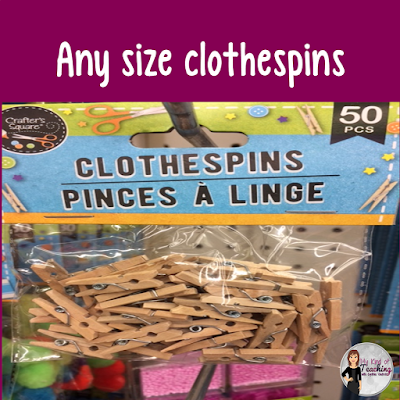
#3 - Clothespins
Using clothespins to clip items helps your child develop fine motor skills.  Use clothespins to pick up pom-poms or other small items.  Call out a number, and have your child use a clothespin to pick up and count out that many objects.   

Clothespins


 #4 - Patriotic Table Scatter
There are so many great educational activities to do with these.  Sort by colors.  Sort the stars by large or small.  Count the red items, white items, or blue items.  Count the stars.  Compare which color has more and which has less.  Are there more large stars or small stars?  Start patterns and have your child finish each pattern.  Use the clothespins you purchase to pick up the items.  After you've completed a LOT of math activities using this one simple product, glue the pieces on construction paper for arts and crafts. Make a Happy 4th of July card, make a poster to carry to a parade, or make place cards with names for a get-together or with the names of foods.  Use your imagination.  This one activity can keep your child busy for a LONG time! 

patriotic table scatter

 #5 - Cyclone Fever Twirly Toy
My grandson has had SO much fun with this one.  The heat index has been CRAZY, so he's played with it inside.  Again, this one is great for math activities.  Predict which color will fly the highest or the most distance.  Measure to check.  It's a great science lesson for force and motion also!

Cyclone fever

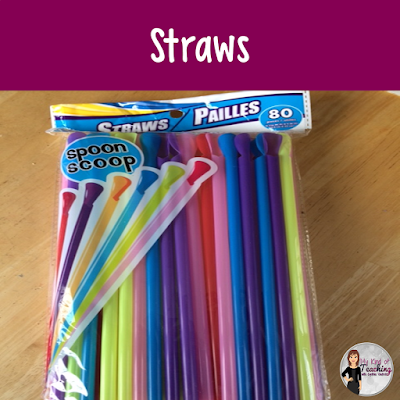
 #6 - Straws
Sort the straws by color and count them.  Cut the straws into different lengths, and put them in order from shortest to longest or longest to shortest.  Make patterns.  Use the straws to make shapes.  Add large marshmallows to build 3-D shapes.  Use the straws for non-standard measurement of the distance of the twirly toy (10 yellow straws or 20 blue straws).  Use the straws as counters for adding or subtracting.  Of course, use them for drinking deliciously cold slushy drinks!

straws

 #7 - Bug Catcher
Not only will your child love scooping up and catching insects, but there are other uses, as well!  Use these with items in a container of water.  Catch small objects as they are floating by.  Pick up pom-poms, or scoop up rice.  This is another fun way to develop fine motor control.

Bug catcher

#8 - Pick up Pairs Card Game
These cards are great for developing your child's vocabulary.  Discuss the types of habitats of the different animals.  Discuss different kinds of skin coverings.  Sort the animals by their skin, where they live, or number or legs, or classify as mammals, birds, amphibians.  One of our favorite games is to turn them all over and play a game of classic memory. 

Pick up pairs card game

#9 - Cookie Sheet
Not only is a cookie sheet magnetic, but it's the perfect size to hold in a lap when traveling this summer.  Use it to hold items for playing so that they stay contained.  Use it to keep crayons from rolling off.  It's also perfect as a "desk" for books and coloring books.  It can even be used for a food tray!  

Cookie sheet

#10 - Puzzles
Puzzles are a lost gem in today's world of technology.  When I taught kindergarten, we used a lot of puzzles in the classroom.  This is another activity that is perfect for developing fine motor skills.  Puzzles also help build logic, reasoning, and cognitive skills.  We love to put small magnets on the back of each puzzle piece, pop them into a Ziploc baggie with the front of the box for reference, and take them along on a road trip (or even just a trip to town).  Use the puzzle with the cookie sheet to make for an easy and fun activity that really sticks!  

puzzles
(Please note this blog post has an affiliate link for the magnets.  This means that if you purchase using the link, I receive a very small commission that helps me with the upkeep of my website.  However, this doesn't add to the price of the item for you.)
Magnetic tape

Do you love Dollar Tree as much as I do?  It's a frugal and effective way to have fun learning at home.  Don't miss out next month when I give you ten more ideas to purchase for July.  

Fun and frugal learning is just...

My Kind of Teaching!!!


Editable Calendars and Newsletters

This past year, we became a 1:1 digital classroom.  During "Meet the Teacher Night", I had Chromebooks set up all over the classroom for parents.  They filled out all of the information I needed through Google Forms.  It was great having everything I needed all nice and neat in a Google Spreadsheet!  I was especially excited to get their email addresses.  Can you believe that I got all but three?  WOW!  I had never had it so easy before.

(Please note that this blog post has affiliate links.  This means that if you purchase using the links, I receive a very small commission that helps me with the upkeep of my website.  However, this doesn't add to the price of the item for you.)

By having their email addresses, I was able to keep parents up to date with things going on in our classroom, as well as share my Google Calendar with them.  While this was all very exciting, I still felt that it was important to do things the "old-fashioned" way and send home a parent letter and a calendar.  Sometimes, it's all about having things at the touch of a fingertip.  Other times, it's all about having that information in your hand.

Editable calendars and newsletters


I LOVE these calendars I designed a few years ago.  (Did you know that if you purchase once, you can download the updated calendars again each year for FREE?)  I love to change to a different design each year.  In fact, I usually do one in color for myself and the black and white editable calendar for parents.

Each editable set includes both landscape and portrait orientations for your convenience.  Each set also includes an editable monthly newsletter and an editable weekly newsletter.


Portrait editable newsletterLandscape editable newsletter


Editable covers that can be personalized are also included!

Editable covers

These calendars can be printed and placed in a notebook.  Do you want them to look more professional like some of the expensive ones out there?  I purchased this binder several years ago, and I'm so happy I did!  I've used it for so many things!  (Don't forget that it can also be used as a tax deduction...whoo-hoo!)


Click spines

You'll definitely want a pack of these click spines that can hold up to 85 pages!  These are also reusable, so once you have both of these, you are set for YEARS!!


You can find these calendars in a variety of themes.  This year, I’m using turquoise and lime green, as these are my favorite colors.


Editable newsletters

You can also find these themes: year-round, black and white (I think this one is so elegant and was my calendar choice last year), scrappy, polka-dots and glitter.  These calendars are so inexpensive that you can buy more than one to swap out your theme.


Orange newsletter

Green Newsletter

Purple newsletters

Yellow newsletter

Included with your download, you will also find a "How to Use This Product" guide.  I want you to get the most bang for your buck because that's...

My Kind of Teaching!

See you soon,

Once-a-Month Grocery Shopping - Part 1

Let’s face reality; teachers don’t make an exorbitant amount of money.  Most of the teachers I know live on tight budgets. 


Through the years, I’ve had to make some choices about the best ways to stretch my hard-earned money...just like you’ve had to do, too.  Several years ago when my children were little and I had only been teaching for a few years, it seemed that it was harder and harder to stretch those dollars.  We also had a dream to one day build a house and be able to afford to move out of the trailer we were living in. 


There was no way to cut our “fixed” expenses, such as our mortgage, car payment, etc.  One area I felt I could really control was our grocery budget, so I decided to start grocery shopping only ONE time a month.  I wanted to see how “LOW I could go”!

STEP ONE

A few days before going to the grocery store, make a list of everything in your pantry, refrigerator, and freezer.  You may need to spend some time organizing everything.  By keeping similar foods together, it is easier to know what you have.  After you have completed this, make a list of all of the items you need to purchase to remain “stocked up”.

Once you have a master list, it will help you know which items you purchase on a regular basis.  Most people use the same ingredients over and over with little deviation.  For me, there are only a few times, such as holidays, birthdays, or other special occasions, when I purchase different items.

According to how many items you have, this may take you several hours or even a few days to complete this first task.  However, it is VERY important that you know what you have as a starting point.  Part of my problem before using this method was that I would buy things I already had because I was disorganized.  Not only did this lead to wasteful spending, but food would sometimes have to be thrown out because it would no longer be edible by the time I “discovered” it. 

Put those items with the closest date to expiring in the front so that you will use those items first!  Becoming organized will help keep you from wasting food.  Throwing away food is like throwing money in the garbage, and you would never do that, would you?

What are you waiting for?  Well, maybe it’s a ready-to-print master list.  If so, I’ve got you covered!  Click on the picture to download and print.


Spend some time this week discovering what is in your pantry, refrigerator, and freezer.  

Click here to read your next steps to save money as you begin grocery shopping in a whole new way.

Helping you save money and stretch those dollars is just 


See you soon!