Multiplication Fact Fluency

When I was a student in 4th grade, I remember my daddy sitting on the couch with me every night after dinner to practice my multiplication facts.  He helped me daily to commit them to memory.  It is a precious memory for me.  (Oh, how I HATED it at the time!)

Today, it seems that life is so busy that it's almost impossible to find time to give that kind of concentrated effort.  In addition, if you teach with Common Core, how to use strategies to solve multiplication is taught, which is very confusing to parents.

I get it; I REALLY do!

  1.  lack of time
  2.  different way of learning/teaching
However, nothing (and I really mean NOTHING) beats that good 'ole memorization of those important multiplication facts.

Thus, I made games for the classroom because...who DOESN'T love games??  Certainly none of the students I've ever taught!

I made five games for multiplication and five games for division (because they are equally important).

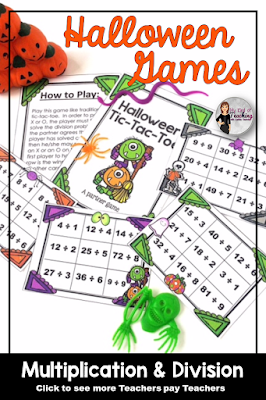
These games have a Halloween theme.

Halloween themed multiplication and division game


What about if you don't do Halloween in your classroom?  That's okay. I've got you covered also!

I also have these same ten games for multiplication and division with a FALL theme!

Fall themed multiplication and division themed


Let's take a closer look at each of the games.

MULTIPLICATION GAMES:

Game # 1:  Build a Monster

Students use the spinner to spin the two number monsters and multiply those numbers together.  The student announces the answer.  If correct, the student then spins the bottom spinner with the monster parts.  The student selects that monster part, and the next player is up.  The first person to build a monster is the winner.  

This can be be played with a partner or in a small group.
Build a Monster multiplication game

Game # 2:  Spin It to Win It

The student will spin the two witch spinners, multiply the numbers, and tell the answer.  If correct, the player will use a dry-erase marker on the laminated gameboard to connect two dots.  When a player is the last to draw the fourth side of a box, the student puts his or her initials in the box.  When all boxes are complete, the player with the most boxes is the winner.  

This is best for 2-3 players.

Spin it to win it multiplication game

Game # 3:  Oogey Boogey Math Facts

These cards are placed in a bag or a container.  Students take turns drawing out a card and telling the answer.  If correct, the student keeps the card.  If a student draws the "oogey boogey" card, the student must return all of his or her cards.  

Set a timer on this one!  The student with the most cards at the end is the winner.  This is perfect for partners or small group play.

Oogey Boogey Math Facts

Game # 4:  Ghostly Bump

This is the traditional Bump game with ghosts!  The first person to place all of his or her playing pieces on the board is the winner!

Ghostly bump multiplication game

Game # 5:  Escape the Spider

Two players place their playing pieces on the star.  Each player takes turns drawing a multiplication card and solving.  If correct, the student moves one space.  The first player to reach the arrow and escape from the web is the winner.

Escape the spider multiplication game

DIVISION GAMES:

Game # 1:  Witchy Feet Memory

The students place the cards upside down in an array.  Each player turns over two cards.  If the two cards match, the player collects the cards and goes again.  If they do not match, the cards are turned over for the next person.  The winner is the person with the most pairs at the end of the game.  

This works for partners or in a small group.

Witchy feet memory division game


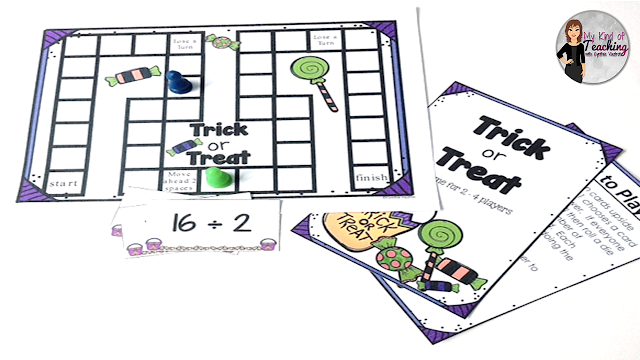
Game # 2:  Trick or Treat

The students take turns drawing cards, solving, and if correct, moving on the board.  The first person to reach the finish line is the winner.
Trick or treat Division game

Game # 3:  Halloween Tic-Tac-Toe

Students will play with partners for this game. Students will take turns choosing squares, solving the division problems, and if correct, marking with Xs or Os.  The first with three in a row is the winner.  Fun and fast...this is perfect for early finishers.Halloween Tic-tac-toe Division game

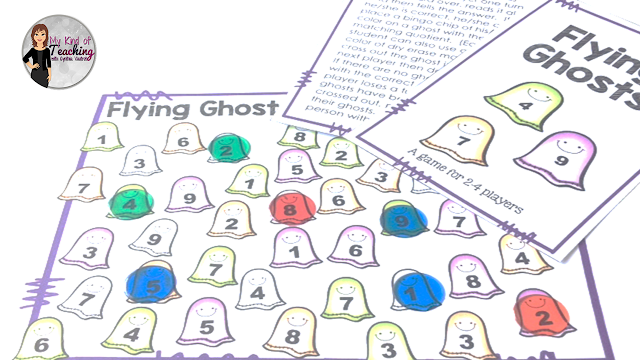
Game # 4:  Flying Ghosts

Each student draws a card and solves the equation.  He or she then places his or her chip on a ghost.  When all ghosts have been covered, the person with the most chips is the winner.
Flying ghosts Division game


Game # 5:  Monster Eyes.

This game is played with a partner.  Each partner has a gameboard.  The player will roll a die, choose a problem on the row with the number rolled, and solve.  If the partner agrees that it is correct, the player will draw an eye on the problem.  The winner is the first person to complete any row. 

Monster eyes Division game

These games work best printed on cardstock and laminated for durability.  

They can be used in so many ways including:

  • math centers 
  • partners 
  • small groups  
  • remediation  
  • intervention  
  • guided math  
  • early finishers  
  • indoor recess  
  • and more   

Utilizing games is one of my all-time favorite ways to learn!  That's just... 
My Kind of Teaching!!


Joy in the Homeschooling Journey

As you know, I retired after thirty years of teaching this past May.  What you might not know is that I have the most wonderful opportunity of helping my daughter and son-in-law homeschool my grandson.  We officially started this past Monday, although we have had many days of classroom fun during the last several months.  Today, I want to share some pictures with you of our first day.

I have sixteen years of experience in teaching kindergarten.  What I do not have experience in is homeschooling.  However, I know what I want it to look and feel like. Even more importantly, I know what I do NOT want it to be.  I am extremely comfortable taking care of my own curriculum.  I am extremely comfortable not using a ton of workbooks or a computer program to teach my dear grandson.  Instead, you will find us playing, creating, and having FUN as I help him learn everything (and more) that he needs to learn.


Luke and Grammy's Classroom
Here is the sign on our door.  We both claim ownership of this very special place.


Shelfs with colorful bins from walmart
I added new shelves found at Walmart for only $15 each and baskets I had previously purchased for my classroom.


Each class session begins with the pledge and bible study
We begin each class session with the pledge and Bible study.


Painted hand keepsake from teacherspayteachers
We made Mommy and Daddy a special keepsake on the first day of school.  I found this for free on Teachers Pay Teachers.  You can find it here.


Luke doing calendar work, checking the weather, and learning about shapes.
We do calendar work, check the weather, and learn about shapes each morning.


Luke using his cutting and gluing skills
We won't be doing a ton of worksheets in our classroom.  I don't believe in using them just for the sake of using them, but cutting and gluing are important skills.  

Building the same triangle shape
We used colored popsicle sticks that I added magnets to for visual discrimination and building the same shape.


Board games are perfect for learning!
We played a fun board game for social studies about the neighborhood.  Board games are so much fun.  Playing them doesn't even seem like learning!


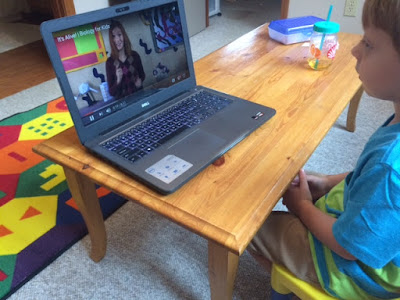
Science video for living and nonliving things
We won't be using a curriculum that has him learning strictly online.  However, we will be watching some videos.  This one was a science video from YouTube about living and nonliving things.


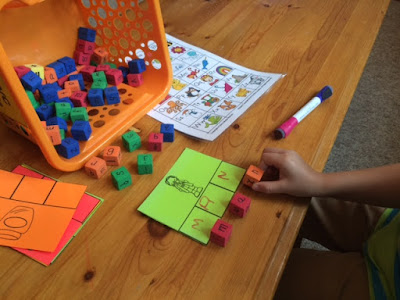
CVC words by sounding out the words, building the words with blocks and then writing the words
We worked on some CVC words by sounding out the words, building the words with blocks, and then writing the words.


Which number will win
There is so much learning with this probability game I made.  We worked on predicting, less than, more than, sizes, and more!


Simple alphabet puzzle from dollar tree
I could go on and on about the many things that could be learned from this simple puzzle I purchased at the Dollar Tree.  It's my favorite place to shop!  

Do you want to learn more about homeschooling your child without a purchased curriculum?  Find full details at my homeschooling Facebook page, "Fun Learning with Grammy."

Homeschooling my grandson is DEFINITELY... 

My Kind of Teaching!!


Genre Reading Challenge

Have you ever had an idea, event, or experience that suddenly made you “click” with a coworker?


For me, that experience happened when I read The Book Whisperer by Donovan Miller last summer.  I was literally blown away.  I could not underline, highlight, and take notes quickly enough.  I raved about it to my coworkers, but only one of them was interested in reading the book.  I quickly shared my book with her andBAM!!!!


Owl with quote

After four years of working together, my coworker and I REALLY started bonding.  I had always admired her and looked up to her (figuratively and literally as I’m barely 5’0!!).  We were having daily conversations, brainstorming about getting our class involved in the 40 Book Challenge, and making Google Forms.  The next thing we knew, we had come up with an idea to fill our hallway with books...GIANT books!! 


Traditional Literature

Biography, Autobiography, Memoir


We made nine giant books for nine different genres.  Above each book, we added the characteristics of the genre.  To finish the look, we added a matching bookmark.  During the year, students wrote recommendations and added to the books. These could also be used to list all of the books read during the school year.

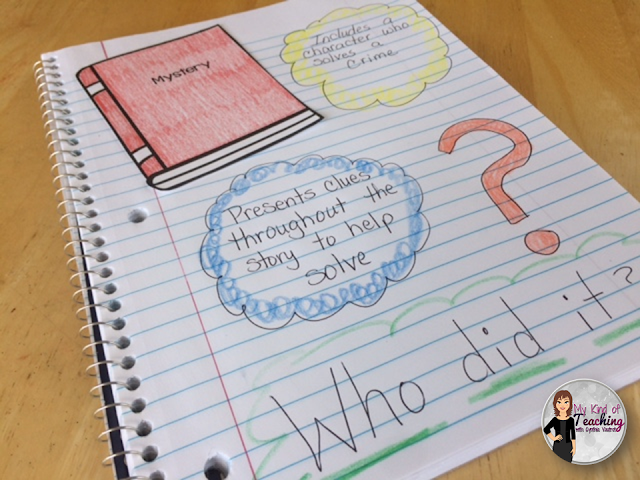
Instead of using reading logs (which always seemed to get lost or parents didn't sign), I made an interactive notebook for the students to use.


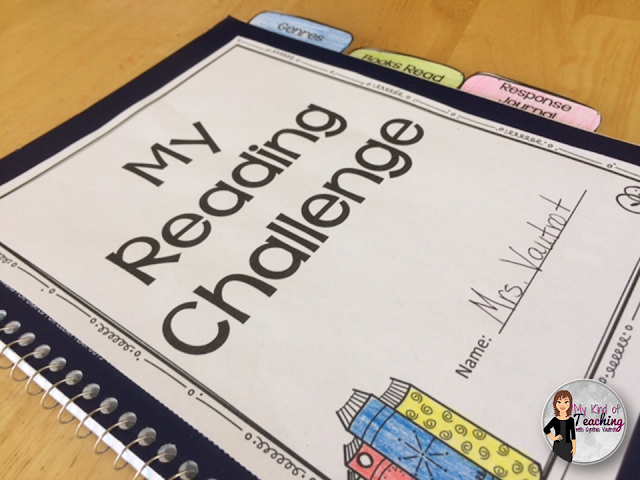
My reading challenge

my reading promise

Reading challenge


We took notes as we worked through the PowerPoint over several days.  Students used their notebooks during the year to write reading responses.


At the beginning of the school year, we became a 1:1 digit school.  In addition to the physical reading responses, I created a Google Slides product to use with Google Classroom.  These worked extremely well also by giving students preselected responses to write about.  


Google slides for digital learning


  • All of these items can be used simply for getting your students excited about reading.  
  • They could be used in the media center.  
  • These giant books can be located in a central location or maybe even the cafeteria to encourage students to read. 
You certainly do not have to implement the 40 Book Challenge or read The Book Whisperer to encourage students to read, read, read.  Sometimes, all it takes is a giant book to spark that curiosity. 


If you are interested in any of these items in my store, you can click on the pictures below.


Reading genres reading challenge


Reading response bundle


What better way is there than to let your love of reading bond you with a coworker who becomes your teacher BFF?  Wouldn’t that be even MORE fabulous?

That’s just

My Kind of Teaching

See you soon!


FREE Scavenger Hunts

How do you learn the best?  

For me, it is certainly not by sitting and listening all day long.  That's why I like to put some movement into our classroom.  Movement is great for both homeschool and public school!


Fun Scavenger hunts for kids of all ages

Whether your children are five or fifteen, there's fun to be had in a scavenger hunt, and I have several for you.  The best part is that they are FREE!

Notice the higher vocabulary on some of these.  Your child is like a sponge.  Take advantage!  Don't minimize vocabulary, even at the youngest age.  A rich vocabulary helps expand your child's brain.  Explain the meanings of the words, and use them in everyday conversations.

(Side note - People are absolutely amazed at my little grandson's vocabulary.  It's because we never simplified language just because he was little.  So many people think, "little person, little words".  NO!!!  Use those big words.  They can handle them!)
Meme with babies


Use one of these scavenger hunts when you and/or your child is feeling restless, or use it when you need a fun break.  Other benefits are exercise and cognitive thinking.  What one person finds as an answer may very well be a different answer from another person.  It's good to discover that more than one answer will work.
Freebie scavenger hunts

Click on picture to download your free copy.


That's just...

My Kind of Teaching


Once-a-Month Menu Planning

You're organized.  You've shopped for ONLY items on sale.  You're stocked up.  We're now ready for the BEST part...MENU PLANNING.


Simple and easy menu planning for tired teachers

The Big Idea

The main thing to remember is that you will plan all of your meals for the next month around what you have on hand already stocked up.  

(If you're feeling a little iffy about planning for an entire month, try starting off by planning for just one week.)

The Master List

Include your family in this important step.  It will help them feel like they're a part of this new way of thinking in your household.  Make a MASTER LIST of every meal you serve.  On your list, make a heading of the main ingredient (ex: chicken, pork, beef, pasta, etc.).  Under the heading, list every dish you cook using that main ingredient.  Ask your family to list their favorite dishes, and make sure to include those.  Don't forget to do the same for side dishes, breads, and desserts.

Include your family in menu planning


Meats are usually the largest expense of a meal.  To save the most money each week, try to plan at least one or two meatless meals.  Consider making a heading of meatless meals, such as cheese sandwiches, vegetable soup, baked potatoes and salad, veggie or cheese pizza, tomato soup, pastas, vegetable lasagna, breakfast for dinner (waffles, eggs, hash browns, etc.).  The list is endless!

Keep this master list handy to use each month when you plan a new menu.  Add new recipes to it as you discovery more you like.

Making a Plan

As you begin, think about your normal work week.
  • Is there a certain night for church or other activities?
  • Do your children have practice or ball games that will make for a late evening?
  • Are you more tired usually on Thursday than on Monday?  (As a teacher, this was always the case for me!)
  • Does your family have a large meal on Sunday?
  • What day is a good day for someone else to prepare a meal?
Print out a calendar to use for planning out your meals.  (I also suggest using a pencil to write.)  Look at your master list.  Which ones do you have all of the ingredients already in your pantry/fridge/freezer?  Write those meals on your calendar.  As you plan, let your children choose their favorite meals for sometime during the month.  Try to include some of these suggestions to simplify your life.
  • Plan one or two "easy" nights each week.
  • Plan a night (or two) for someone else to cook.  (Even younger children can fix cold sandwiches for the family.)
  • Plan a night to eat up all of the leftovers.  (My daughters used to make a menu each week as for a leftover "restaurant".

Breakfast/Lunch/Snacks

On a separate page, make lists for breakfast, lunch, and snacks.  List these as "choices".  These are meals on your own (without planning - unless you choose to do so).  By making a list to display, it helps the family see what they CAN choose from and ensures that they are not eating items that are needed for your dinner menus.

Putting Your Menu into Action

Post the completed menu on your fridge or somewhere else easily seen.  Each evening, check to see the next evening's meal plans to allow you to thaw, meal prep, etc. in a timely manner.

The Benefits

  • The first words out of your darling family's mouths are no longer, "What's for dinner?"  (If it is, point to the calendar, or give them "THE LOOK",  haha!)

  • After an exhausting day at work, you don't have to come home and try to figure out a game plan for a fast meal.

  • Without a menu, extra trips to the grocery store are sometimes needed, causing extra expense.

  • With a plan, it's easier to grab fast food, which again eats into that budget!

  • With a plan in place, the afternoons are not as hectic, giving you a little rest time!

Pull out those menus and get started.  You're just in time for a new month and to get any kinks worked out before it's time for back to school.

Check back next Friday when I'll share some of my favorite frugal meal plans!  :-)

That's just...

 MY Kind of Teaching!

No-Prep Math Centers for August

Teacher confession time...

Every year, without fail, the end of school rolled around, and for the entire last month, I COULD NOT WAIT for the last teacher workday and summer to begin, and...whoa, whoa, WHAT???


When your teacher brain won't shut off even though it's summer

Just like that, I would start reflecting on things to prepare for the next school year, changes to implement, and new ideas to try.  I would always get so charged up that it took me two or three weeks to get out of school mode and into summer mode!  Does this happen to you??  (PLEASE say yes...lol!)

The first thing I always tried to do during the last month of school was to prepare my "No-Prep Math Centers" and "No-Prep Literacy Centers" for the first month back in school.  It was the perfect time of year because I always had a lot of students who couldn't wait to help by cutting and bagging.  (Hence, the NO prep.)  Don't worry that it's now summertime. They really ARE so easy to make that you'll have them made in a snap!


No prep math centers


Today I'm going to focus on my No Prep Math Centers for 4th grade.  However, you can find these for 2nd grade, as well as 3rd grade in my store, along with No Prep Literacy Centers for 2nd, 3rd, and 4th grades.  (Just click on the grade level to see the units.)

Each month usually has ten centers and two or three bonus activities.  If you are like I always was, there is WAY too little prep time in your day, and EVERY. SINGLE. SECOND is precious!  These centers are a breeze to get ready!  I have included games, interactives, foldables, movement, and more!  There is no colored ink used (other than answer guides), to make this even MORE user-friendly!

You have several choices for printing:
1)  Copy onto regular white copy paper.  Use for the week, throw in the trash, and print a new set next year!  (Easy-peasy, right??)
2)  Do you want to have those pops of color?  Print just the game pieces on colored paper (or construction paper).  Again, you can throw away or keep.  (Mine have held up for 2-3 years without lamination.)
3)  Print on colored cardstock and laminate.

How you choose to prepare really depends on the amount of time you want to spend prepping. 


This month's centers include:  

Fractional Sets 


Print and go fractional sets

Fourth grade is HUGE for fractions, so I like to get the year started with a review of fractional sets.  I like to always print the directions for all of my centers on colored copy paper to draw the students' eyes.  I also like to use two different colors for the fraction and the fractional set.  I only use a couple of pieces of my hoarded precious color copy paper.  I make copies of the student response sheet and my answer page on regular white copy paper. 


Rounding

Rounding


I love to keep this center out (along with several of the other ones) to use for small-group remediation.  Some students need that extra support and guidance on a concept, and being able to play this as a game is perfect.  In the center, the students work together to decide if the numbers round up or down.  In years past, I have used this as a center during our unit on rounding and then used the worksheet for a formative grade.  At a glance, I was able to see which students needed to work in a guided small group.


Place Value

Place value

This activity is one of my favorites to do during the first couple of days of school during our math time as we are getting settled in.  While I'm checking to make sure that I'm positive how every student is getting home, checking in supplies, or any of the other million and one things I need to accomplish, the students do this activity as a whole class during quiet time.  (Admit it; you know that by the middle of that first day back, you need just a LITTLE time to rest your ears, haha!)  I put the directions on the document camera and project them onto the large screen at the front of my room.  I carefully explain the directions and even do a couple with the students to make sure that they understand.  While they work, I'm able to do some of those much needed beginning of school chores!

Comparing Numbers

Comparing numbers

This is one of my students' favorite centers every year and it is oh, so simple!!!  Students play in a small group.  The number cards are stacked upside down on the table.  Students take turns going around in a circle and drawing the top card.  They begin in the ones place to build the number.  (This game can be played for any place value to differentiate your students' needs.)  Once every student has built his or her number, someone spins the spinner using a pencil and a paper clip.  If the spinner lands on "greater than", the student with the largest number wins.  If the spinner lands on "less than", the student with the smallest number wins.

Classroom Treasure Hunt

Add movement to your classroom with classroom treasure hunts

I love giving my students every opportunity throughout our day to have some movement, considering that recess is only 15 minutes each day (so, so sad).  My students LOVE these scavenger hunts.  I print the cards on bright paper, scatter them all around the room, and students move around to read the cards and write the answers.  I've used this center both as a small group and as a whole class (which is my favorite).  I like to collect their response pages to use as an informal data collection for different skills so that I can start forming small remediation groups.  However, I always place the cards under the document camera so that we can review and discuss as a class.

Addition with and without Regrouping

Addition with and without grouping

I have yet to give students "naked" addition or subtraction problems without hearing groans from someone.  However, when they have a cool name like "ninja" attached, all of a sudden, students can't wait to complete the problems.  (I'll call ANYTHING a cool name if it encourages students to do their best work!)

Standard, Expanded, and Written Forms
Standard, expanded, and written form

Our curriculum map always begins the year with all things related to place value.  I've tried to include a lot of activities in the August unit to help reinforce those concepts.  As always, I copy the instructions on colored copy paper.  I make three copies of each of the other pages so that the standard form is one color, the expanded is another, and the written is yet another color.  I then have students play this game with partners (or in small groups of 2-3 students).  Students turn the cards facedown.  They take turns turning one card from each row to try to make a match in the classic "Memory" game.  On another week, I have the students complete the second part, which is the response sheet of cutting and making the correct matches.  Numbers look very similar to make sure that students really understand the different forms.

Word Problems

Word problems

Sometimes, students just have to be convinced that they enjoy math.  "I LOVE Math" is an accordion book that students make.  They then choose word problem cards, read them, and solve in their books. 

Bar Graph

bar graph

I've combined the fun game of "I Spy" with a bar graph.  Students search for the pictures, count how many there are of each, put the information into a bar graph, and answer questions.

Ordering Numbers
Ordering large numbers


I always make two sets of these numbers.  (Make sure that you use two different colors for your own sanity of keeping them separated...haha.)  Students will work together to put the numbers in order.  Students then work independently to complete a response sheet by putting numbers in order.

Get a freebie when you join in on the freebie blog hop by clicking here.

Storage 

You can store the pieces of each center in a Ziploc bag, a large envelope, a small basket at the center, or whatever makes life easiest for you.  

Direction posters are included for each center.  Placing these in the center gives explanations to the students so that you are not spending valuable time explaining multiple times.


Printing

I don't worry about printing because I have HP Instant Ink.  This means that I get 300 pages every month.  It is based on the number of pages, not the ink.  My printer lets HP know when ink is running low, and I receive new ink in the mail before I even need it.  SCORE!!
Get free ink using my referral link

Click on the picture to get your own great deal on a wireless printer so that you can print all you need without worry!  
Please keep this link to enter to get extra months of FREE ink!
http://try.hpinstantink.com/hP7Wm

(Please note this blog post has an affiliate link for the printer.  This means that if you purchase using the link, I receive a very small commission that helps me with the upkeep of my website.  However, this doesn't add to the price of the item for you.)

Click on any of the above pictures to see this product in my store.

Easy- peasy, making your life breezy - that's just...


My Kind of Teaching!