Engaging St. Patrick’s Day Activities Your Students Will Love


Holidays are always such a fun and exciting time in the classroom. Students are eager to celebrate with classroom parties, treats and games. That is all good and fun, but I also like to use holidays as a time to learn as well! Incorporating holidays into everyday lessons gets students excited to learn and helps them to stay focused and engaged. During the school year, we celebrate many fun holidays, which means tons of opportunities to turn the fun holiday season into an educational moment as well. March is here, Spring is in the air, and it is time to celebrate St. Patrick’s Day. Here are some of my favorite ways to incorporate the lucky Irish holiday into classroom learning your students will love!


These digital engaging St. Patrick's Day activities are a great way to incorporate the history, culture, and fun of St. Patrick's Day traditions into your March lesson plans this year.

We all know how much our students love using technology in the classroom. Digital resources can help keep students engaged during learning which is always a good thing in my book. Google apps are a fantastic digital option for teaching in the classroom, doing virtual e-learning, or for homeschooling students! They are simple and easy to use for both teachers and students. One of my favorite Google apps is Google Slides. Students can work through the slides one by one interacting with text, images and/or videos. They also get experience using the mouse, typing, and other technology skills. It's a great platform for digital learning activities.


Let’s dive into some of these fun St. Patrick’s Day activities you can use on Google Slides! 


All About Ireland

You can’t talk about St. Patrick’s Day without talking about Ireland! This Ireland country study makes a great social studies lesson to use around the Irish holiday.


Your students will love working through the google slides using clickable options to watch videos and learn more about the country of Ireland and it's rich history.
I love using teaching my students all about Ireland by using these interactive research activities. Then students are provided with related writing activities to help them assimilate the information they learned.


My students love learning in a variety of ways and this digital lesson has it all. With clickable buttons, they can watch videos, read information, and listen to songs all about the country of Ireland.


They love learning facts about the country, history, and cultural activities like Gaelic football. Traditions like kissing the blarney stone and watching Irish dancing are also fun for students to learn about! It is a great way to teach about a different country and make comparisons with our own.


Learning All About Ireland is the perfect way to kick off your St. Patrick's Day study or activities.


Let’s Learn About Potatoes!

Your students will have so much fun learning all about potatoes and why they are an important part of the Irish culture with these fun and engaging St. Patrick's Day activities interactive Google Slides.
Typically when we think of St. Patrick’s Day we think of all things green, shamrocks, blarney stones, and leprechauns…not potatoes!! But truthfully it is a part of Irish culture that brings with it lots of great learning opportunities for students.

I love to include it in my St. Patrick’s Day lessons and students enjoy learning about the starchy vegetables they love to eat mashed or covered in butter and sour cream!

In this resource, students will learn the history of potatoes (yes, they have a history!), how they grow, how to cook them, and about the great potato famine in Ireland.

After they learn all about potatoes there are some great writing activities for them to complete including facts and opinions and summaries using can, have, are.

You could even expand on this fun lesson by showing students how to grow a potato in the classroom. They are really easy to sprout using just a potato, some toothpicks, and a cup of water. This article from Sciencing.com will tell you everything you need to know!

St. Patrick’s Day Fun

St. Patrick's Day is a holiday that most of our students are aware of, even though they don't have Irish ancestry. And while most love to jump into the fun of wearing green, they often don't know a lot about the history of this holiday. That means it is the perfect topic for digging in! Take students on a deep dive into the holiday itself. St. Patricks Day is a holiday rich with history and fun traditions.


Take your students on a deep dive with these interactive Google slides featuring all the fun of St. Patrick's Day. You might even learn something new and fun too!

This activity is a fun way to explain to students the background of this holiday and why we celebrate like we do.


My students love learning about why we wear green on St. Patrick’s Day, the history behind the holiday, and all about those mischievous leprechaun creatures! There are also a variety of extension writing activities for students to complete based on what they learned.


Pull out students’ creative side and see how much of the lesson they comprehended with writing prompts like “What I learned about St. Patrick’s Day. . .” and “What traditions take place on March 17th?”. These are engaging activities for students that are both educational and fun!


Let’s Talk About Rainbows!


St. Patrick's Day has a science connection too! Rainbows! When we think of traditions surrounding St. Patrick’s Day we think about leprechauns and a big pot of gold at the end of a colorful rainbow.

Bring in some science fun to your engaging St. Patrick's Day activities with these fun rainbow activities including fun facts and a virtual field trip.
This is the perfect timing to dive into all things about rainbows and what makes them so cool and magical including the science behind them! Students will learn cool facts about rainbows and how a rainbow is made.

They also get to see fun experiments and even go on a virtual field trip!

Like the other St. Patrick's Day activities, this one also includes some extension activities so students can apply what they learned.

This is a fun and interactive way to learn all about rainbows and celebrate St. Patrick’s Day at the same time!

The Magic of St. Patrick’s Day

There is so much fun and learning that can happen around the St. Patrick's Day holiday. With these easy digital research and writing activities, you can cross off those social studies, science, and writing standards. So break out your best green outfits, set your leprechaun traps, and get your students excited to learn all about St. Patrick’s day.


Be sure to grab all of these digital St. Patrick's Day activities in my Teachers Pay Teachers store!


This digital bundle includes four digital engaging St. Patrick's Day activities to help your students learn all about the history of St. Patrick's Day and the Irish culture and traditions that make it so much fun.

Pin It!

Save these engaging St. Patrick's Day activities to your favorite Pinterest teacher page so you can come back any time for fun and exciting digital St. Patrick's Day activities your students will love!


These digital engaging St. Patrick's Day activities are a great way to incorporate the history, culture, and fun of St. Patrick's Day traditions into your March lesson plans this year.

Fun Activities to Teach Telling Time

Time is one of those lifelong skills that we have the honor of teaching. It's something that we use all day, every day, and is necessary to be successful in life. The art of telling time on an analog clock can easily become extinct with all of today's technology and digital options. So, it's up to us to continue teaching our students how to tell time on every clock available. Here are some fun activities to teach telling time in your classroom.

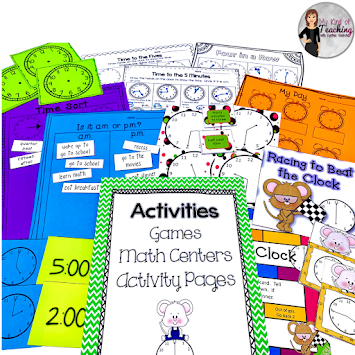
These telling time activities are perfect for students in 2nd through 3rd grade who are ready to learn how to tell time beyond just identifying the hour. Packed full of fun activities, it's easy to differentiate and meet your students where they are in their telling time learning journey. Includes pre and post assessments to make your teacher life even easier!

Telling Time

Telling time is first introduced in Kindergarten and First Grade. 
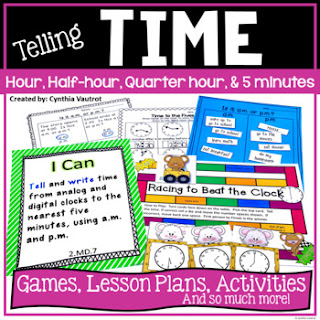
These telling time activities are perfect for students in 2nd through 3rd grade who are ready to learn how to tell time beyond just identifying the hour. Packed full of fun activities, it's easy to differentiate and meet your students where they are in their telling time learning journey. Includes pre and post assessments to make your teacher life even easier!
These young students are taught about the hour hand and minute hand, so they should be familiar with a clock and its parts by the time they get to you. 

It's our job to expand on this concept and teach them about telling time to the hour, half-hour, quarter-hour, and 5 minutes. 

There are many different ways to teach this and tons of activities you can incorporate to make learning fun and engaging. 

It's also important to remember to differentiate your activities and strategy. Students will be on all different levels with this skill, so you need to make sure you are reaching all of them. 

Here are some fun activities to teach telling time that I use in my classroom. 

Fun Activities to Teach Telling Time

Activate Prior Knowledge

Before introducing anything new, I review what students have been taught in previous years.  Not only does this help me identify any learning gaps, but it also makes sure that we have a common starting place.  

Before you jump into your telling time activities, take a minute to review prior knowledge with your students using these fun telling time activities they will love.
We start by discussing the hour hand and the minute hand and how they are similar and different.  This helps to make sure that students know and understand the vocabulary that we will be using in our telling time unit.  Then we jump right in with some review.  I run off pictures of analog and digital clocks on bright-colored card stock to help with this.  We then use these cards in many ways to review telling time skills that students should already be aware of.

One of my favorite activities with these cards is a movement match-up game.  Each student gets either a clock card or a time card.  Then I set the timer and they have 1 minute to find their match.  At the end of each round, I do a quick check to make sure students are correctly matched.  Then I have them switch cards with someone in the room.  If they had a time card, they switch with a clock card and vice versa.  This makes sure that students practice both reading the time and reading the clock.  We play a few rounds of this game.  If the class is doing really well I might even challenge them to match up in less than one minute.  

Another favorite activity with these cards is playing an old-fashioned game of Concentration.  This is the perfect game to add to small groups and centers.  Since the cards are already made, it is super easy to set up too!  It is a fantastic way to review. 

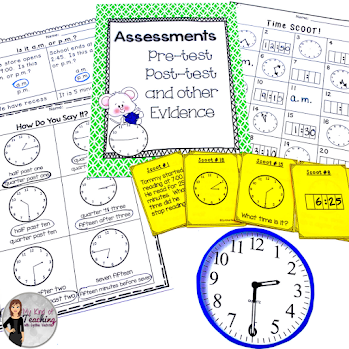
Use these pre test activities to get an accurate assessment of what your students already know. This way you can meet them where they are and plan your activities and lessons accordingly.
Pre-Test

I love to give pre-tests before beginning any unit. It's a great way to assess where my students are, identify any holes and correct any misunderstandings.  I use this information to plan my lessons and guide my instruction. It allows me to see what areas I really need to focus on and which areas they have already mastered. 

While I will always cover all the skills, some years we may move more quickly in a review style and other years the same concepts require more instruction.  

Plus, it's always fun to see how much they've grown at the end of the unit.  Having a solid pre-assessment is such a great way to collect data on skills and truly see what skills they have learned and mastered.

Let the Learning Begin

I love to use anchor charts as visual representations of vocabulary words and concepts that we will be learning.  These anchor charts give students important language, definitions, and an image to refer to.  During any given unit, our anchor charts remain posted in the class.   

Introducing new concepts for telling time is not only fun but also easy with these printable activities your students will absolutely love!
The anchor charts serve as great reference tools for my students to use throughout the unit. Sometimes I run them off for the students to have a copy in their notebooks. By giving students this reference tool, we are setting them up for success.  Not only do they have a tool to refer back to when they need a reminder, but we are also teaching them to take ownership of their learning.  Learning to find the answer instead of asking for the answer is an important skill they will use for the rest of their lives.

After introducing a skill we move right into practice.  I love to use the I do, we do, you do approach in my lessons.  I begin by modeling and talking through my thinking.  Then we do some practice together.  During this step, I transition from explaining what I'm doing to asking questions to allow students to explain their thinking.  Then we finish up with students working independently.  

Practice, Practice, Practice

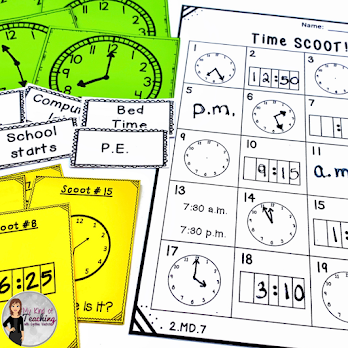
Practice makes perfect! Use these super fun and engaging activities to get your students excited about practicing telling time in so many fun ways they will love.
This is where the magic happens. Telling time is one of those skills that requires a ton of practice to master the skills. I like to start slow and work on one skill at a time.  By doing this students can build on their previous learning and success to help them with new skills.

Practice activities take many different forms.  I like to keep our practice time feeling fresh so I mix it up by having my students work independently, with a partner, and in small groups.  We also do a variety of activities from hands-on sorting activities to games to practice worksheets.  It's this variety that really helps to reach the learning styles of all the students.

Once we have practiced one skill, then we start the process again with the next skill.  It's a little like this: Introduce, I Do, We Do, You Do, Repeat!

Craftivity

Our telling time unit is not complete without this fun and interactive craft. This is my favorite of the fun activities to teach telling time, and the students love it too!


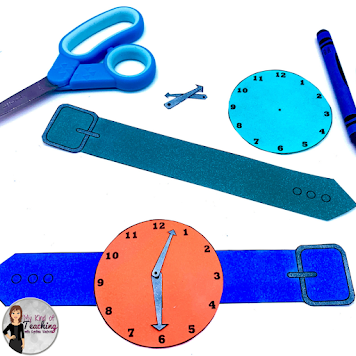
Using fun hands on activities like a telling time craftivity watch craft are great ways to cement learning and keep your students feeling engaged and excited about telling time.
Each student gets to create their own watch!  This is something really special for them because most of my students don't have their own watch. The kids really get into it! 

I just run the watch pieces off on construction paper or colored cardstock to make them a little more durable. The kids cut out the pieces and put together their own watch.  I also let them personalize their watch band so that each one takes on its own personality. 

They love having their own watch to practice telling time on. I use the watch activity to review before we take our post-test.  During our telling time unit, students will keep their watches on their desks.  At random times throughout the day, I will say something like "it is 10:15.  Please show me that time on your watch."  Students will then manipulate their watch to show the time and hold it up.  

They really love the randomness of when I call out these times.  And sometimes, just for some giggles, I might say something like "it is . . . {long pause} . . . writing time."  There are usually lots of giggles as students were so sure they would be grabbing their watch.  

However, you use them, this hands-on, interactive craft is a great way to get students working with time.

Post-Test

When we have finished all of our telling time concepts, it is time to wrap up the unit with an assessment.  I usually give them the same test again that I used for the pre-test. This way it is an apples-to-apples comparison. You can really see their growth when comparing the two. I take the time to give my students each of their tests and let them see how far they've come as well. They really get into this, and it does wonders for their self-confidence. 

Save Time Teaching Telling Time

I hope you'll try these fun activities to teach telling time.  I've pulled all my favorite teaching tools, activities, and more into this Telling Time unit. If you'd like to save time, then you'll want to check out my Telling Time resource. It includes everything you need to teach telling time to the hour, half-hour, quarter-hour, and 5 minutes. You'll love all of the math activities and games included in the resource. It's great for 1st-3rd grade because you can use it as an introduction, to teach the lesson, and as a spiral review. 

These telling time activities are perfect for students in 2nd through 3rd grade who are ready to learn how to tell time beyond just identifying the hour. Packed full of fun activities, it's easy to differentiate and meet your students where they are in their telling time learning journey. Includes pre and post assessments to make your teacher life even easier!

Save it for Later

Be sure to save this pin to your favorite math Pinterest board. These fun activities to teach telling time are sure to be a class favorite.  Helping you save time with one unit to teach about time is just...


These telling time activities are perfect for students in 2nd through 3rd grade who are ready to learn how to tell time beyond just identifying the hour. Packed full of fun activities, it's easy to differentiate and meet your students where they are in their telling time learning journey. Includes pre and post assessments to make your teacher life even easier!

Focusing on Fractions

Teaching fractions is a big milestone in elementary grades, but I don't know very many teachers who actually look forward to the task. It can be difficult to teach and difficult for students to understand, especially once you move past the introduction. The good news is that it doesn't have to be. The key is figuring out how to break it down in a meaningful and engaging way so that your students really understand the concept. Today, we are focusing on fractions.

You and your students will look forward to teaching and learning about fractions this year with these fun focusing on fractions activities.

Fractions Are Important

While there are many math concepts (especially higher-level ones) that make us think, "Can't we just skip this part? Why do we need to learn this anyway? We are never going to use it." This is NOT the case for fractions.

Using fractions is a part of our every day lives. These fun focusing on fractions activities will ensure your students get started on the right foot.
We use fractions daily without even realizing it. Dividing up a project among different people, cooking a meal, and cutting up that delicious pie all force us to apply our previously learned fraction skills.  

Learning fractions is a foundational math skill that students need to be successful in everyday life. Let's look at a few other areas where focusing on fractions is important:

  • Architects need precise measurements to plan structures
  • Doctors need specific calculations for treatments and surgeries
  • Contractors deal with fractions daily when building houses and businesses
  • Moms cut up pizzas to serve their families
  • And who can forget those 1/2 off sales

Fractions are the foundation of so many things. As teachers, we need to take the time to make sure our students really understand the concept. Getting them interested and excited about the topic by making it relatable can be a real game-changer.

How to Teach Fractions Effectively to Your Students

It's no secret teaching fractions can be tricky. This is because of their complex nature and a general lack of interest from students. Through lots of trial and error over the years, I've learned a few strategies that seem to work the best when focusing on fractions. 
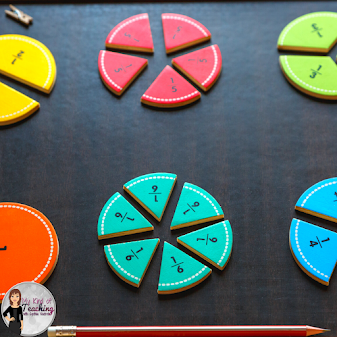
    Use hands on activities like these pie pieces to help students see fractions represented in an easy to understand visual way.
  1. Hands-on Learning - Making fractions visual to our students is a huge part of the learning process. Breaking out manipulatives and blocks allow students to build their own fractions. They can see and touch a fraction in a way that just looking at a picture doesn't quite meet.  They can also gain a solid understanding of part, part, whole during this process. 
  2. Visual Representation - It is important to see a fraction in several different ways. Having them create fractions on paper allows you to achieve this easily. You can use a grid to do this. Circle and pie graphs also work well for this activity.
  3. Technology - It's always good to mix it up a little and add some technology to our lessons. This makes the skill interactive and gives our students hands-on practice in a different way. 
  4. Flexibility - Get ready to be flexible with your plans. It may take a little bit longer for your students to pick up on the concept than you'd hoped. That's okay. Take the time to go back and pull out the manipulatives again, or do what you need to reinforce the skill.
Most importantly, don't forget your patience! It will go a long way when teaching this skill.

Focusing on Fractions Activities

After the initial fraction introduction, it's time to break things down even further. I like to do that by focusing on three main categories and following a very strategic plan of action. 

Simplifying Fractions

We all know that we must reduce a fraction to its simplest form. So, this is the next thing I introduce to my students after they have general knowledge of a fraction and its parts. 

I do this by using a PowerPoint lesson and a companion worksheet. This strategy works well for me in all areas of teaching fractions. It's very methodical. My kids know exactly what to expect and enjoy the step-by-step process.

We begin with the PowerPoint lesson discussing what it means for a fraction to be in the simplest form. Then, we move into different ways to simplify fractions. 

The step-by-step process forces students to ask themselves questions to determine if the fraction is already in simplest form or if it needs to be reduced. 

Then it guides them through the process of doing just that. At the end of the presentation, there is an opportunity for some guided practice. I love this part of the lesson because I can see who "gets it" and who needs more practice. 

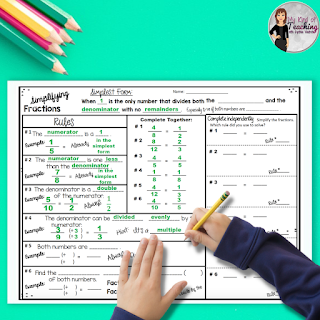
This simplifying fractions lesson and worksheet helps students develop a solid understanding of what it means to reduce or simplify a fraction
The companion worksheet is a great addition to the PowerPoint presentation. I use them together. The beauty of it is that it allows for guided practice with amazing discussion opportunities, partner work, and finally independent practice. 

As we work through the PowerPoint slides, we fill out the companion worksheet together. Be sure to take your time and work slowly through the powerPoint. This will give your students time to really think about their answers and allow them to gain a more in-depth understanding of the topic. My students always have a huge success rate with this process.

Improper Fractions


Now it's time to blow their minds! The very sight of an improper fraction or a mixed number will get your student's heads spinning. This concept does not look like the "normal" fraction you just spent so much time introducing. No worries! With a little time and a few steps, your students will be masters of improper fractions.

How should you teach this? You guessed it! The same method we just discussed works wonders with this skill as well. 

It's time to break out that PowerPoint lesson and companion worksheet. The slides discuss numerators, denominators, whole numbers, and how they relate to each other. 

Most importantly, I reinforce the fact that improper fractions are NOT BAD just because they are different. 

Remember to take your time when moving through the PowerPoint so your students can effectively complete the companion worksheet.  

These awesome companion worksheets allow your students to get in even more fractions practice after completing the PowerPoint activities.I love it because the multiple pages and activities provide a chance for guided practice before throwing in the deep end on their own. 

We complete the first page together as a group. It is an awesome sheet that's pretty much an interactive reference sheet. It reinforces the process and serves as a great guide for an independent practice where students will practice changing improper fractions to mixed numbers. Then they will simply the fractions if needed.

Students love how the process is broken down for them, and the tech aspect of it makes it fun! The PowerPoint is also great for reinforcing skills in small group instruction and intervention groups. 


Decomposing Fractions

Decomposing fractions is not only fun but easy with this kid friendly PowerPoint your students will absolutely love.
This lesson teaches students how to break apart fractions and see them in different ways. I like to demonstrate this with fraction models. I'm always game for a good old-fashioned hands-on lesson.  If you have a class set, it's a great idea to allow students the opportunity to decompose fractions with their own blocks. 

I use my tried and true PowerPoint lesson and companion worksheet here, too. 

The slides take them through decomposing a fraction and a mixed number. Then it gives them the chance to work with a partner while decomposing numbers using pictures. 

The students get so excited to share their work with the class! 

Of course, the companion worksheet is broken down to follow the PowerPoint exactly so your students will be able to follow along while staying actively engaged in the lesson.

Focusing on Fractions Just Got Easier

You can grab all of these lessons and practice activities in my Fractions Bundle. It provides a step by step process for teaching your students about:
The PowerPoint presentation walks them through the process while teaching them all of the rules along the way.  They'll get hands-on practice of their own while completing the companion worksheet that goes with the activity.  Grab this fractions bundle in my Teachers Pay Teachers store.

This Focusing on Fractions Bundle includes so many fun and engaging fractions activities you and your students will love.

Save It For Later

Be sure to save all of this info for focusing on fractions to your favorite math board.

Helping you to make fractions easier for you and your students.  That's just...

My Kind of Teaching!


You and your students will look forward to teaching and learning about fractions this year with these fun focusing on fractions activities.


Following Directions Activities Your Students Will Love

Following directions is such an important lifelong skill. Without it, we can't function in everyday life. It's something parents begin to teach early on with their children and teachers continue to reinforce in the classroom. This skill doesn't always come naturally, and it is much easier for some compared to others. Learning to follow directions takes lots of practice and patience. Not to worry though! I have some great following directions activities your students will love.


Following directions is an important skill for our students to learn. Use these fun and engaging following directions activities to help your students practice following directions.

Following Directions is Important

When we think of following directions it doesn't seem like there's much to it. But if you stop and really think about all things you must do to follow directions, it's easy to see just how hard it can be. Following directions requires us to do several things all at once. 

Learning how to follow step by step directions is important for all of our students, and practice makes perfect which is why these activities are just the thing to help your students learn how to follow directions.
Here are just a few of the cognitive skills that go into following directions: 

  • decipher the details of either spoken or written language
  • put the directions into appropriate steps to complete the task
  • learn to ask for clarification of directions if we don't understand
  • determine what tools or supplies are needed to complete the task
  • complete the task
Whoa! No wonder it can be so difficult for children as we give more and more complex directions.  But all is not hopeless!  We can teach our students how to follow directions and have fun at the same time!

How to Effectively Give Direction to Students

Have you ever sat back and thought about how you are delivering directions or instruction to your class?  Here are a few things I like to consider before giving my students directions:
  • Am I being clear?
  • Are the directions concise?
  • Have I explained why?
  • Did I give them time to process?
  • Can they explain the directions back to me?
If the answer to these questions is yes, you are more than likely providing good directions to your students. 

As the teacher, it's easy to second guess yourself when giving your class directions. Use these following directions activities to help your students practice following directions in a fun and easy way.Visuals are also great tools to use when practicing following directions with your students. Display directions on the board with words and/or pictures.  This allows students to self-monitor and complete activities independently.

For students that need fewer distractions or more help with multi-step directions, provide them with directions right at their student desk. Many students that struggle with following directions thrive with visual steps to reference.  

However you choose to provide visual directions, this is one thing I know: this will eliminate many questions and save students from frustration. When our students can follow directions and complete a task independently, they gain a sense of pride and ownership in their work.  And . . . with some practice, they start to naturally do this on their own!

Following Directions Activities

Use the following directions activities as a whole group activity to get your kids excited about following step by step directions to complete a drawing.Mastering the skill of following directions takes lots of practice. We typically practice this skill informally all year long.  Many times this looks like classroom rules and procedures, completing assignments, or following one-time directions.  Boring! 

Learning to follow directions doesn't have to always be tied to something so serious.  In fact, we can help our students learn these important skills in a fun and interactive way!

Games like Simon Says are great ways to practice following directions.  While this game is usually one-step commands, why not increase the difficulty.  Give two and three-step directions for students to follow.  And . . . make a rule that they can't start doing the activity until you have finished the instructions.

Another favorite activity to practice following directions uses drawing a picture.  The students love it and it lends itself to simple and complex directions. 

I like to use following directions pictures in two ways: listening to directions and reading directions. 

For the listening to directions version, I will give students a blank sheet of paper. Then, I'll read step by directions aloud to them. I may say, "Draw a tree on the right side of the page. {Pause} Draw a big pile of leaves under the tree. {Pause} Draw a dog under the tree." 
Students get excited to complete the drawings in the following directions activities.

I will continue to give directions until the picture is finished. The kids love the anticipation of finding out what the finished picture will be. I love that students are working on auditory processing skills and following directions.

You can also use following directions pictures as an independent activity that works on reading comprehension and following directions.

For this activity, I will provide students with a sheet of paper with the directions on it. Students will complete the task on their own. It is very easy to see who followed directions and who did not!

The students absolutely LOVE these following directions pictures and will ask to do them.  Not only are they a great way to teach following directions, but with a little discussion time afterward, students can really dig into why it is important and what they can do to improve. 

Following Directions Activities Just Got Easier

Use these following directions activities as part of your whole group instruction, independent practice and much more.Wouldn't it be nice to have a year of following directions activities right at your fingertips? I thought so, too! 

So, I created a variety of following directions activities for my classroom.  As I started using them consistently I noticed that my students were getting better and better at following directions the first time!  

I want that for your students too!  That is why I have made these activities available in my Teachers Pay Teachers store. In fact, I have an entire category just for following directions activities! 

Each resource will provide lots of practice for following directions, using critical thinking skills, improving listening and reading comprehension, and some creativity too. 

The following directions activities are very versatile. They can be used for:
  • Whole group instruction
  • Independent practice
  • Morning tubs
  • Centers
  • Early finishers
  • Use this fun Thanksgiving following directions activity to help your students learn to follow directions in a fun way.
    Informal assessment for comprehension skills
  • Auditory listening activities
  • Lessons for a sub

There are many versions available like 
You and your students will love them all.

I hope these following directions activities have given you some great ideas to get started with in your classroom. Remember, practice makes perfect and that goes for skills like following directions too!

Following Directions Activities for the Entire Year

If you are ready to incorporate following directions activities in your classroom, then make sure to look at this bundle.  It will have you covered from the beginning of the year to the end!

Save these Tips and Ideas for Teaching Following Directions

Be sure to save this pin to your favorite classroom Pinterest board, so that you can come back when you need some ideas for teaching or reviewing following directions with your students.

Following directions is an important skill for our students to learn. Use these fun and engaging following directions activities to help your students practice following directions.


3 Tips for Teaching Multistep Word Problems

It's time to start teaching your elementary students multistep word problems. You are not alone if this thought makes you feel a little uneasy. Teaching multistep word problems is no joke! You know how difficult it can be to get students to read the problems, do the correct calculations, and formulate an answer for one step, much less multiple steps. But, what if I told you that you don't have to stress about teaching these important skills as much as you used to? Sounds great right? Check out my top 3 tips for teaching multistep word problems to help your students master this important skill! 

Help your 2nd, 3rd, 4th and 5th grade students master multistep word problems.  These practical tips and ideas for teaching word problems with multiple steps and operations will help you teach this important skill to your students.

Why is Teaching Multistep Word Problems so Tricky? 

So, why is it that students tend to struggle when we introduce multistep word problems?  Well, there are several factors that can impact students when learning these types of problems. The biggest is that we have added a larger component of another very difficult skill to the mix: reading. 

Now along with figuring out a math problem, we have given them more words to read and comprehend. And even though we are conscious of the language used in the problems we present to our students, this can still trip them up. 

Multistep word problems can be difficult for students to learn.  These tips will help when teaching multistep word problems.On top of adding more reading, multistep word problems also require more math. We are asking them to complete multiple operations to come to a correct answer instead of just adding or subtracting, multiplying, or dividing two stand-alone numbers. This jump can be hard! 

Finally, we ask them to put their answer into a complete sentence. Gone are the days of just spitting out a number as a correct response. 

So, essentially, multistep word problems combine reading, multiple mathematical operations, and writing. Some of the most difficult skills for our elementary learners! No wonder why teaching them feels like such a beast to tackle. 

Don't worry though! I am going to share my tips to help you make this process easier for not only your students but yourself as well. One of my biggest secrets though is using these print and digital word problem task cards! Pair these with the tips and your students are sure to be on their way to mastering multistep word problems!

Tip #1: Utilizing "I do, we do, you do" Practice 

If you haven't heard of "I do, we do, you do," I highly suggest using it throughout your teaching to help build independence for your learners! This setup happens to work perfectly for teaching multistep word problems. 

Since your students will probably not have a lot of experience with word problems like this, you want to begin by modeling how to complete the problem. This is the "I do" step of the practice. Modeling is key to helping students become masters at multistep word problems because it allows them to see the thought processes they should be using while solving the problems. 

I do, We do, You do is a great strategy for modeling and practicing any new skillWhen modeling, make sure to talk through each step you are taking and explain why you are doing it. For the best results, model several different types of multistep word problems for your students so that they can begin to see some of the variations in thinking that they might need to use. 

Once you feel like you have adequately modeled how to complete the problems, start the "we do" portion of the practice. In this part of the practice, students try solving a problem as a whole class or in small groups with your help. Your job during this time is to facilitate the completion of the problem. If students go astray, point them back in the right direction. If they have a question, stop and model the process more.

Finally, it is time for the "you do." This is where students independently practice solving the multistep word problems on their own. The idea is that they have seen it done, been helped while doing it, and should hopefully now feel more comfortable tackling it on their own. 

It is important to note that this isn't necessarily a linear process. You might have to go back to the "I do" and "we do" stages multiple times to reinforce concepts and help students towards true mastery. 

Tip #2: Highlighting Multistep Word Problems 

Like I've said before, multistep math problems pose quite a unique challenge for our elementary students. There is a lot for them to wade through to get the correct answer. That is why I teach my students the power of highlighting!

By teaching students how to break down a multistep word problem they can see learn to see each individual step.
Since students will be dealing with multiple operations that they need to complete, I teach them to find the first operation they have to use and then highlight it in a specific color. I like using green with my students. Then depending on how the worksheet or task card is set up, they either write the operation they need to use or circle it. This can simply be putting the math sign such as +, -, or x. 

Then I have students continue to read the multistep problem and identify the second operation they need to complete. They highlight this sentence in a different color such as pink so that it contrasts from the first operation. Then, they record the operation they will need to complete. 

Once they know the operations, they have to identify the actual question that is being asked in the word problem. When modeling, I show students that this typically comes at the end of the problem, and I remind them to look for the question mark. They highlight the question in another color. 

By the time they are done highlighting, their problem should be filled with 3 different colors that point them to the specific information they need. Since the other words and information have been weeded out, this makes it much easier for them to focus on computing the correct answer. 

The 3 step highlighting method helps students break the problem down into simpler parts.

In fact, I love using this strategy so much, that I include it in my multistep word problem task cards so that other teachers can easily use it!

Tip #3: Practice, Practice, Practice 

This one might feel pretty obvious, but to truly help your students master multistep word problems, practice is key! In fact, since there is so much involved in just one problem, I recommend even more practice than you would normally present for a math skill. 

Students can use these printable and digital multistep word problems in many ways to get the repetitive practice needed to reach mastery.
Remember students are tackling reading, multiple operations, and writing with these problems. Each of those skills needs time to develop, and the only way to do that is through practice.  But don't worry, more practice doesn't mean you necessarily have to make your multistep word problems lesson take up more days in the year.  Instead, think creatively about how you can weave this problem-solving practice into your day.

Give students 1 word problem a day as a math warm-up or as part of morning work.  Use a word problem as an exit ticket.  Create a problem-solving center as part of your math rotation.  If you take the idea of practice and take it down to 1 or 2 problems at a time, it is a lot easier to find little chunks of time in the day to weave in word problems.

But, I know what you are thinking. More practice equals more work for you. More problems to find or create, more worksheets to review and grade. I understand. Tackling a behemoth like multistep word problems is a lot of work. But I have something that can help take a little off your plate and help your students rock word problems!

Teaching Multistep Word Problems Just Got Easier! 

I may not be able to come help you grade all of that extra practice, but I can definitely help you provide it! Over the years, I have compiled numerous multistep word problems that are perfect for teaching your elementary students. I've converted them into printable and digital task cards so that you can use them no matter your style of teaching or your students' style of learning. Grab this Multi-Step Word Problems resource so that you have one less thing to think about when it comes to teaching this integral skill! 

This Multi-Step Word Problems resource includes an instructional Powerpoint so you can teach the steps and skills.  You also get lots of student practice problems in printable and digital formats.  All of the practice problems include reminders of the steps, to help students not only solve the problem but practice the process.

Multistep Word Problem Instructional Lesson and Practice Activities


Helping you tackle one of the hardest math skills for your students is just... 

 My Kind of Teaching


FREE Task Cards to Make Lesson Planning Easier in October

I hate purchasing something and only having one way to use it, don’t you? 

Don’t get me wrong; there are some things that ONLY have one way to use it.  For others, however, there is often more than one way to utilize it.

I like knowing that I am getting a lot of “bang for my buck”.

Today I am sharing a forever freebie in my store that is perfect for the month of October.


Ideas to use: Free October early finishers task cards


Click here to download these October Early Finisher Task Cards, and then come back here to read different ways to use them in your classroom during the month of October.


Print and prepare your free task cards by printing on cardstock, laminating for durability, and then cutting them out.


You can store them in a Ziploc bag.  My favorite way to store all of the months is by using the little expandable plastic pockets you can purchase at Dollar Tree for only one dollar.

Pink, blue, orange folders


I purchased a few of these, and I stored all of my task cards for the year in these. 

I placed these in a plastic basket in my cabinet.  I used task cards weekly in my classroom, so this is a great storage organization that worked well through the years.

Early Finisher Activities

Place these task cards in a small basket on a shelf that is easily accessible to students.  When a student finishes his or her work, instead of asking you what to do next, the student will get a piece of paper and a task card. 

Morning Work

Display one of the task cards using a projector system.  When students arrive in your classroom, all students will complete the same activity.  If the activity is longer than time allows, have students complete the work during any free time throughout the day.  Students can use spiral notebooks labeled “Morning Work” and complete one activity each day.

Writing

There are many opportunities to get your students to write creatively.  Use a card during your writing segment, and have all students use the same writing prompt.  Encourage students to read their finished products with the class, in small groups of students, or with partners.  Make it really fun for the students by completing the writing prompt also and then reading yours to the entire class!

Center Work

Choose one of the task cards for a center activity.  Copy the card by making it large and displaying it so that all of the students in the center can see it.  Provide needed materials to complete.  For instance, if you use the spiders facts and opinions, add some nonfiction books to the center for students to read and use for facts.

Art Activity

Choose a task card that includes an art activity.  Provide art materials for students to use.  Display the finished product on a bulletin board, your door, or in the hallway to share with others.


No matter how you use these task cards in your classroom, your students will be using their creative juices to write, draw, create, list, design, complete math, learn a little about special days of the month, and so much more!

 I hope these free task cards inspire you for several different activities in your own classroom.

If you love these task cards, you can find the rest of the months for ONLY $1 each!

Early finishers task cards


How do you plan on using them in your own classroom?  I would love to know!  Just comment below!

Finding "Extra" Time in Your Busy School Day

The school day is hectic. Teachers have very little time for themselves. Finding enough time to plan and stay ahead of everything without staying late and taking a ton of work home in the afternoon or on weekends might seem impossible, but it’s not!


How to find extra time in your day


The trick is to find the time when there is no extra time. 

 What? That doesn’t make sense…but it will!

There are little pockets of time spread throughout your day, but you don’t even realize that they are there!

• Make a habit of carrying a notepad and pen with you ALL. Day. Long! If you’re walking down the hallway and think of something you need to include in your lesson plans for next week, jot it down! Having a place to record all of your random thoughts during the day can save you so much time later!

• While it’s enjoyable and a stress reliever to visit with coworkers during planning time during the day, before school, or after school, it’s genuinely a time-sucker! Instead, spend your time visiting at lunch and recess duty. Those are perfect times to unwind and destress during the school day. It’s truly astonishing how much time you lose when talking to others.


Set a timer


• Set a timer for 15 minutes during your planning time. When you are laser-focused for even 15 minutes, you will be amazed at how much you can get done. Use this time exclusively for writing lesson plans, getting materials together, etc.

• Use the year-long monthly calendars you prepared for your year to stay on track. Choose one day out of the month when you can stay late at school. Even if you have to spend an extra 2-3 hours to plan out the following month in-depth, it is better than being late every day for thirty minutes or longer. Doing this will help you get out the door on time the rest of the month and is so worth it!

• Make all of your copies for an entire week (or even better, the entire month) at one time. Cutting down on trips to the copier will save you so much time during the day.

• Make sure that you have something to work on and complete, such as grading, lesson planning, etc., while waiting for student programs, faculty meetings, and more to begin. Even five minutes will save you time later.

Try to be thoughtful and a good steward of your time. When you can find a few extra minutes in your day, it’s a big win. Doing so will help you more than you realize to leave school on time each day.


Do you have any tips or tricks to find extra time in your busy day?  Comment below to share!

Helping you to get out the door and home to your family is just...