Classroom Reveal!!!

WOW!  It has been one super busy, TIRING week!

We had 5 days of pre-planning beginning Aug. 1 (read... LOTS of meetings), and started school with students on Thursday.  I am so sad to say, there were still things I did not get finished for my walls.  My printer at home died and then the only color printer we have at school tore up.   Luckily, the students didn't realize anything was amiss!  I did break down and go buy a new wireless printer which I am LOVING!

This past week was our first full week with students.  I have had a serious medical condition for the last couple of weeks.  I think most teachers get it at this time of year...
crazy school dreams
tunnel vision
long days
longer nights thinking about everything still needing to be done

Yep, I call this serious medical condition BACK-TO-SCHOOL BRAIN FOG!!!!

Do you get it also?

Thankfully, mine seems to be clearing up and I feel like I can see the world around me again.

**SIGH**  

WARNING... LOTS of PICTURES ahead...

This year I do not have a theme.  I am using bright colors instead.  

I started off by making LOTS of numbers.  I am using them in a variety of ways.


To grab your own set of numbers click here.  Then keep reading to see all of the different ways I use them.


My new 4th-grade classroom was an add-on, which means that there was NOTHING in the room.  Thankfully, after 25 years of teaching I have accumulated lots of my own personal things to take with me.  My principal purchased these book bins and they just came in the mail on Thursday.  My reading class and I were so excited to finally have some storage! 


 Here is our gathering place.  I found this rocking chair (already painted blue) about 8 years ago at a yard sale.  I bought the rug last year for $10 from a carpet mill going out of business.  Some of the pillows were "donated" by my youngest daughter when I cleaned out her bedroom after she got married.  The others were bought at a yard sale this summer for only $2 each and my mom recovered them for me.


My mom took a shower curtain I purchased, cut it in half, and added buttonholes to cover up my storage shelves above the coat racks.

You can see the numbers peeking out from under the curtains.  Students are assigned a number to hang backpacks.


This REMINDER wall is located next to the door as the students exit.  I glued several of my Bulletin Board Dots on the wall.  Information that is important to the students is displayed here.  To find out how to make your own out of cardboard boxes, click here


Here is my classroom library.  Some of the baskets I purchased previously.  I added to my blue and green colors and purchased pink and purple to add to my collection.  The letters are foam glitter letters from Walmart for 97 cents each. 


A little closer view...

I decided to sort my books by series or genres this year.  Each basket was assigned a number and then the name of the basket, along with the number, is posted in front of the bin. 
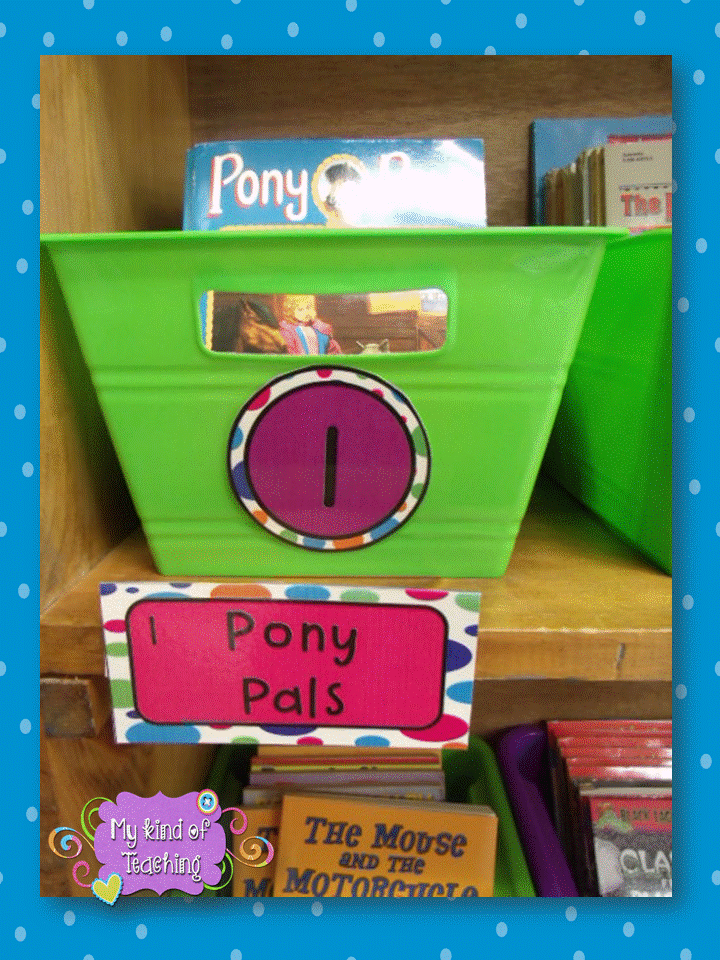

Each book then has a sticker with the same number on it.  So far, this system is working great and all the books are finding their way back to their home!  :-)


Here is a picture of my door.  My bright color theme kind of evolved into polka-dots as well, so I decided to just embrace it.  The background is a $1 table cloth. 

 
Next to my door is this sweet metal board I found at the recycle store for only a couple of bucks.  It would be so easy to do with a small cookie sheet as well.  The smiley face magnet gets placed on the correct area when we leave the room.  I am teaching almost 90 students this year, so this is a must-have when someone is looking for me.


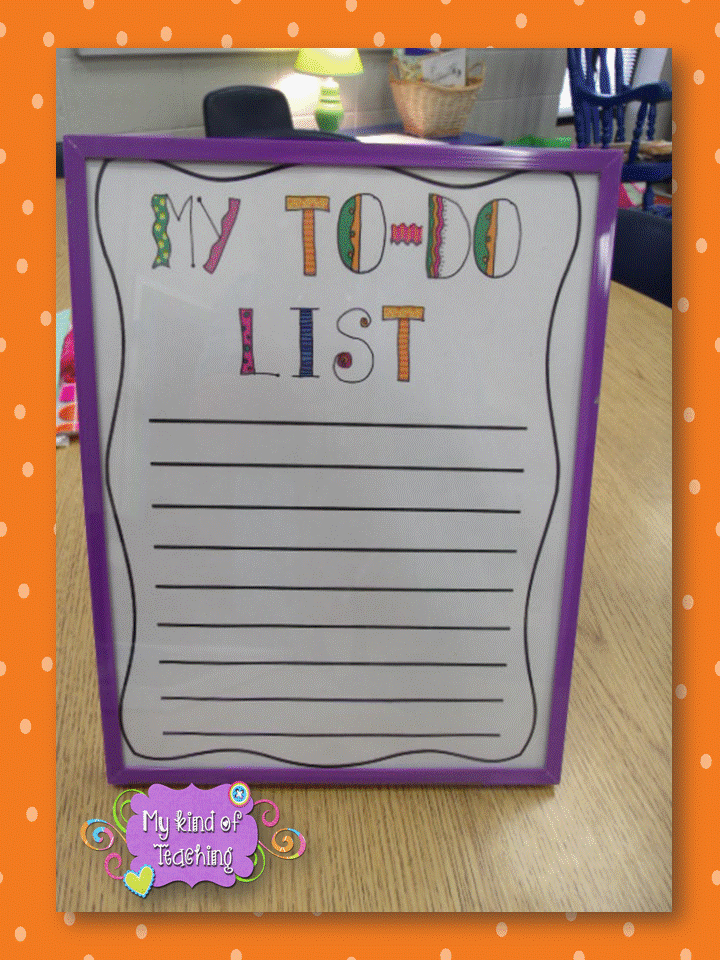
Thankfully when I left the school Friday, My To-Do List was all completed!!!
 

UPDATE 2021

Click here for a FREE thirty-day series with tips, ideas, information, and FREEBIES to have your BEST YEAR EVER!!




Easy Bulletin Board Dots


The bulletin boards in my room are not necessarily where I would prefer to have them.  Like any teacher does, I decided to make something I could use, and I couldn't be happier with the results!

Classroom Hack: Easy Bulletin Board Dots


I call these "bulletin board dots".

Here are the details so that you can make your own easy and affordable bulletin board dots.

I visited the fabulous JOANN Fabrics and Crafts store and purchased five different pieces of pre-cut fabric quarters.  They were $1.99 each. With my teacher discount, I got $1.49 off, so one ended up being only 50 cents!  For about $8.00, I was able to make LOTS of bulletin board dots.  


These bright colors and designs were the perfect addition to add pops of color all over my classroom and were another way for me to add to my classroom theme of bright colors!

Bulletin board dots

Materials:
cardboard boxes (free)
round containers
pen for tracing containers
scissors
fabric and hot glue gun

Bulletin Board Dots


Cut out any size of cardboard circles you like.  Cover with pieces of fabric using a hot glue gun.


Bulletin board dots

Here are five of my largest circles.

Colorful bulletin board dots for your classroom

A variety of fabric circles were completed.

Use pushpins on these bulletin board dots

Hang the bulletin board dots on the wall.  Use a pushpin to attach whatever you want.

These are bright, colorful, and OH.SO.EASY!

That's...


Back-to-School Blog Hop with FREEBIES


Well, y'all...

It's official!!!

I'm back in school.  That's what happens here in the south.  For all of you that were feeling jealous of us at the end of May??

Well, now it's OUR turn...

Yep... I am feeling SUPER jealous of all of you right now!!!

However, to ease my pain (a little), I have joined up with some other great 3rd and 4th grade teachers to bring you a fun little blog hop.  This hop is hosted by a good bloggy friend of mine, Christi Fultz from Ms. Fultz's Corner.

Along the way, you can gather some freebies to enjoy...

Maybe find some new blogs to stalk...

and some new TPT stores to buy from when you DO go back to school (if you're not from the south like me!).

You might even want to join me on Pinterest (hint:  I'm ALL about pinning real pictures to get inspiration and ideas for my room AND yours!)

Here's my freebie...

I also have a back to school tip for you....

RUN!!!!  haha

Speaking of running, when I taught kindergarten, I learned VERY quickly to always wear my running shoes on the first day of school.  One time I had on a dress and heels.  One child tried to run away FOUR times.  I would just hike up my dress, kick off my shoes and yell for the other kids to line up behind me as we would go chasing him down.  Once, he made it to the fence, and I actually had to climb up after him.  LOL...

My REAL tip is to assign each child a number.  Label cubbies, hooks, etc with numbers.  The child will ALWAYS put his name and number (we can hope, right?) on his/her paper, and that same number is used for everything you can think of.  Then as students move out/in during the year, rather than labeling, just assign the new student the same number as a student who moved out.  This will make your life easier (well,a little anyway).

Tomorrow (Monday) you will find a post with more about using numbers, along with a freebie of the numbers over at The Teaching Tribune.

You can grab another freebie from my Facebook page.

Now, head on over to the next blog for another tip and freebie.

And don't forget I've got a product in this HUGE Educents bundle.  A $201 value for only $30!!

Enjoy!
Classroom Freebies Manic Monday


Revisiting Your Teachers Pay Teachers Purchases

Do you ever take the time to revisit your Teachers Pay Teachers (better known as TPT) purchases?  
If not, you really should.

When you sign in, you will have the option of viewing "My Purchases".

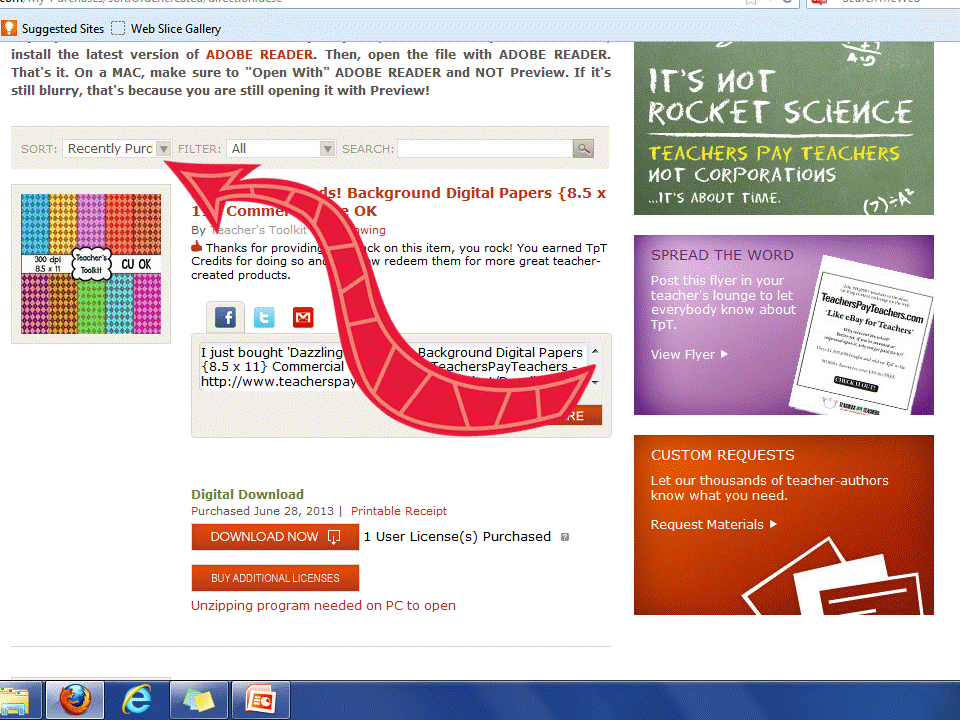
On the drop-down menu next to the word sort, you will be given several options.

You can see your most recent purchases...

You can view them alphabetically...

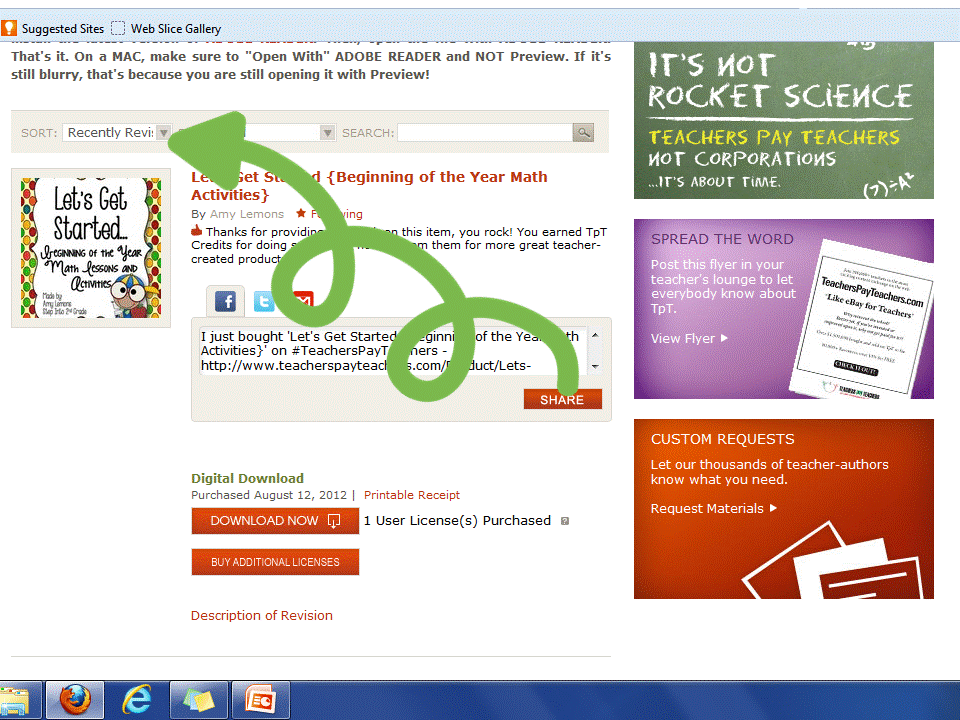
You can also choose "Recently Revised".  I recommend that you do this occasionally.  Sometime there are reasons that sellers must make revisions for typos or even because they add to the product.

If there are any with revisions, it will be flashing "Newly Revised Re-Download".  Underneath, you will see "Description of Revision".  Click on this to see what has been changed or added.

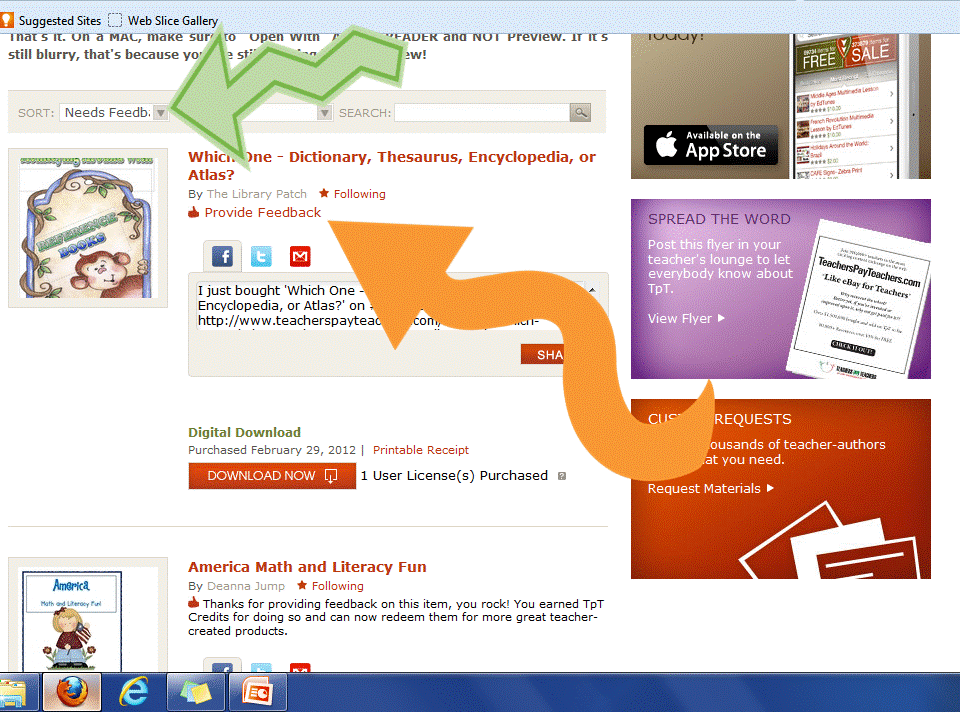
The last is one of the most important...  Click to see if there are any that you forgot to leave feedback on.  This happens to me when I want to use the product before I leave feedback, and the I forget to go back. 
You'll definitely want to be sure you leave feedback.

Why?  As a seller, I really appreciate reading the feedback.  (The more detailed the better.)
Telling me what you like, what works, or what you would like to see added really helps me make my products the very best they can be.

An added benefit to you, the buyer, is that you get TPT Bucks to put toward future purchases.  If you are like me, it's time to start looking around and buying new things for your classroom.  Getting some $$ toward your purchases is like getting a sale, even when there's not a sale!

Head on over and check all of your purchases out and see if there are any revisions or if you need to leave feedback. 


Interactive Data Board for Fact Fluency

Do your students struggle with fact fluency?

Whether it's addition, subtraction, multiplication or division, many students struggle with fluency on a daily basis.

This was an area that we really worked hard on to improve with my students this past year.

And guess what??

Even though they were a lower math group, they all succeeded in learning their addition and subtraction facts to 20.  I was so very, very proud of them.

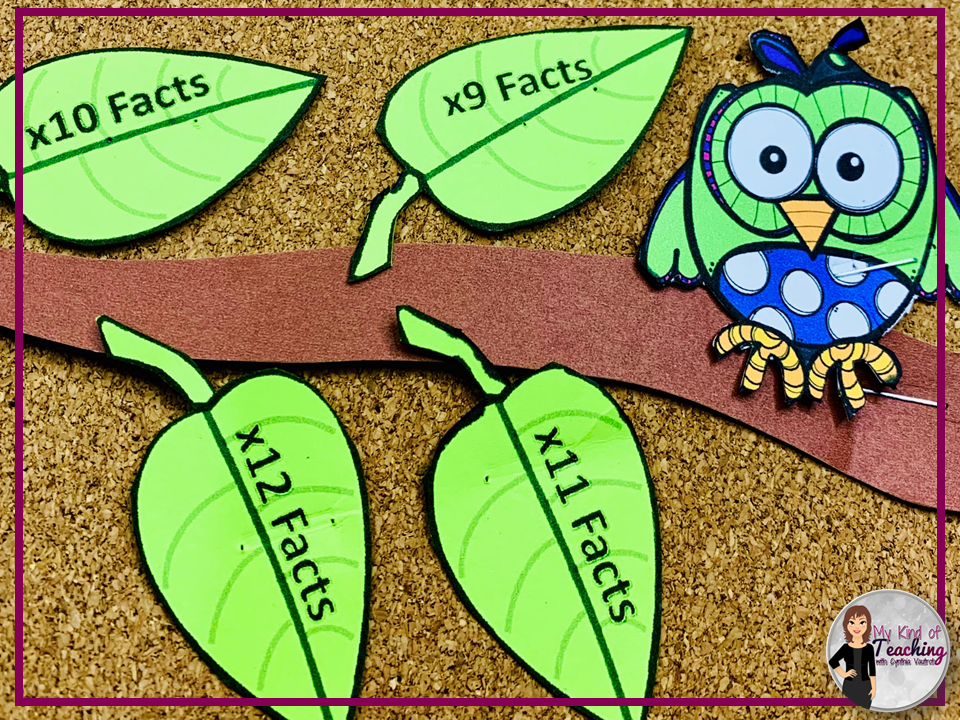
The first thing I did was to implement this Interactive Data Board.


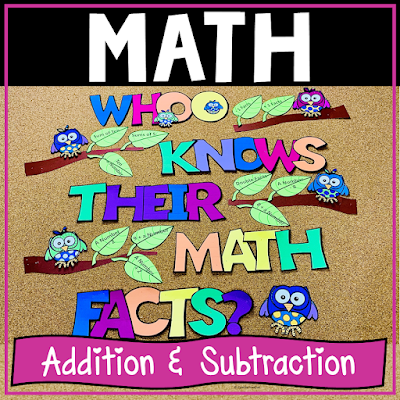
Display "Whoo Knows Their Math Facts" as a data chart to track students' progress.


 My students really enjoyed getting to see their improvement.  As they learned each fact, the student got to sign his/her name on the leaf for the fact.


To go along with the Interactive Data Board, we also have Brain Math every Monday.
 Have you ever heard of Brain Math?

I hadn't either until a fellow teacher shared it with me.

I started it the very next day after he shared and can I just say...

It was AWESOME!!!

It helped my children so much with their fluency facts for addition and subtraction to 20.

Here's how it works...

Have the students use dry/erase boards and numbers 1-10.


Use your projector system or SmartBoard to show the fluency slides.

 Decide on a time limit.  (I started at 10 seconds for each slide.)

Have the students number their boards.  (Most are 1-10, but some vary.)

The students write ONLY the answer next to the number.
(Be sure you say the number as you change slides.)

On this slide, I would say, "#5" and the students would write ONLY the answer of 5.

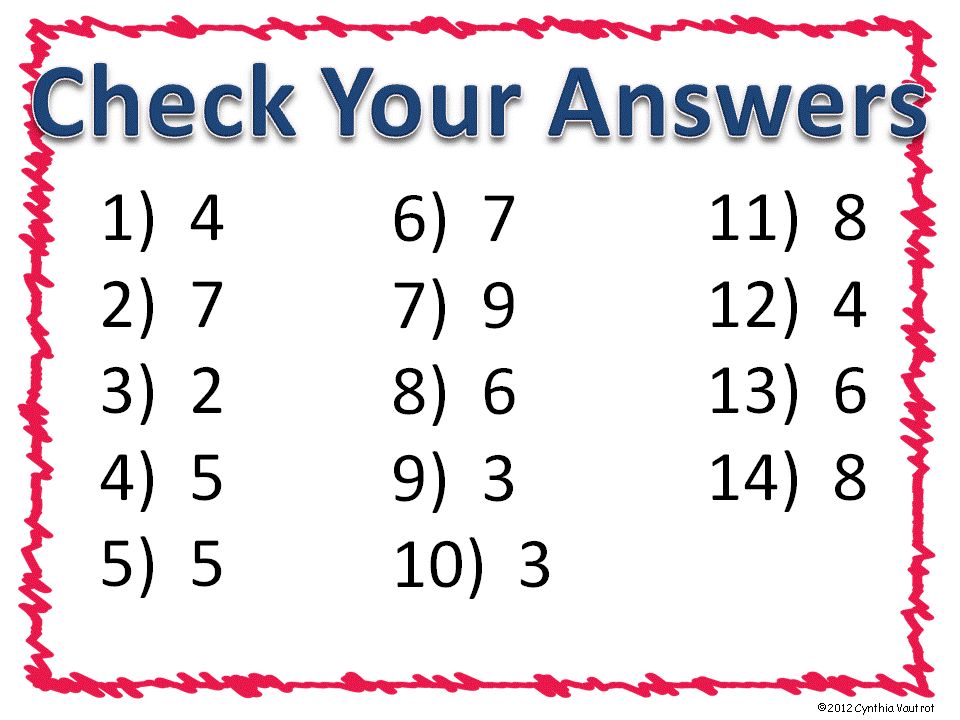
We would continue in a like manner every 10 seconds until we reach this slide.

 When we reach this slide, all of the students would put their markers down and then pick up their erasers

As we went over the answers, they would erase any wrong answers.
As we go over the answers, I am walking the room and scanning their boards.  

At a later point (after practicing each set several times), I give an informal test.  

I usually do 4 at one time by having students fold a piece of notebook paper into fourths.  At the top of each section, they write the name of the slide, number 1-10, and then write their answers.  

By the time we get to this step, I expect the students to be able to answer in 4-5 seconds so we go through the slides quickly.

Either have your students exchange papers to grade, or plan on grading yourself.
You can receive your own freebie to try out by clicking on the picture.

To purchase the full packet that includes a whopping 409 pages for ONLY $15 click on the below picture.


Great ideas for the classroom...that's

MY KIND OF TEACHING!!


Getting Organized

I looked, REALLY looked at the calendar this morning and realized that I only have less than a month to get all of my ducks in a row for back to school.  

YIKES!!!!

So, it's time to start getting some things organized.  There are several things I'm going to be doing from the comfort of my own home before actually heading into my classroom to work.

(Which believe me, will be happening in about another week or so!!!)

One of the first (and easiest) things I always begin with is my calendar and lesson plans.

This year, I've made myself an editable calendar.  


This easy organizational tip will only take you a few minutes to a couple of hours TOPS to complete and will put you so far ahead of the game for next year!

First, I will take the school district calendar and add special dates to my calendar.  

I also add the curriculum map of when things must be taught to the calendar.

Whether you do your lesson plans on the computer or you write them by hand, simply going ahead and filling in all the weekly dates, special days, holidays etc.  will make it so much easier when it comes time next year to do those mundane type of things. 

 If you know your schedule add the times and activities.  If you teach special themes add those into the months you teach.  

ANYTHING you add now, will be that much less during the busy school year.  Remember, we want to make this next year all about Working Smarter, NOT Harder! 


Speaking of lesson plans, how do you organize your activities to make it easier during the crazy, busy, school year?

I get everything organized on my computer (again...at home).  

This organization idea will take you longer, but after the initial set-up, it will be a breeze to drop things into your files and make your next school year's planning a BREEZE!

 
Make a folder on your computer simply titled LESSON PLANS.


Inside this folder, make a folder titled August. 
Inside this folder, make another folder titled Math.

Next, inside this folder (can you guess???)

You got it... MORE folders!

Label these Power Points, Hands on Activities, Worksheets, etc.


Now, close the folder titled Math.  Copy and paste as many times as needed for each subject you teach.  Change the title to those subjects.

Next, close the August folder.  Copy and paste as many times as needed for each month of your school year and change the names.

 I am now ready for all of those wonderful ideas I come across on Pinterest, blogs, TPT, etc.   I can just drop them into the correct folder.  

I just made my job of planning during the school year SOOOO much easier.  Everything I need is at my fingertips when I make lesson plans.

And I won't forget all of those wonderful ideas I came across this summer!

 I hope this helps you to gather your thoughts and start getting organized for the classroom.  Now, I'm back off to Pinterest, to see what other great ideas I come across!  

Getting organized, and feeling confident about the up-coming school year, is My Kind of Teaching!